Manage Edge Delta Users
Managing users in the Edge Delta web application.
2 minute read
Overview
You can manage your organization settings, manage organization membership, and manage user permissions for your organization.
Invite a User to your Organization
When you invite a user, they will join the organization that you are current logged into. To invite a user to a different organization, you must switch organizations, and then invite the user from the selected organization.
- Click Admin - My Organization.
- Click Invite User.
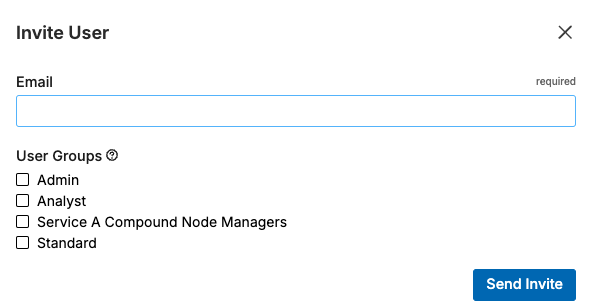
- Enter their email.
- Select a permissions group for the user.
- Click Send Invite.
The invited user will receive an email with a link to join. If the invited user is already a member of another organization, then they can switch between accounts.
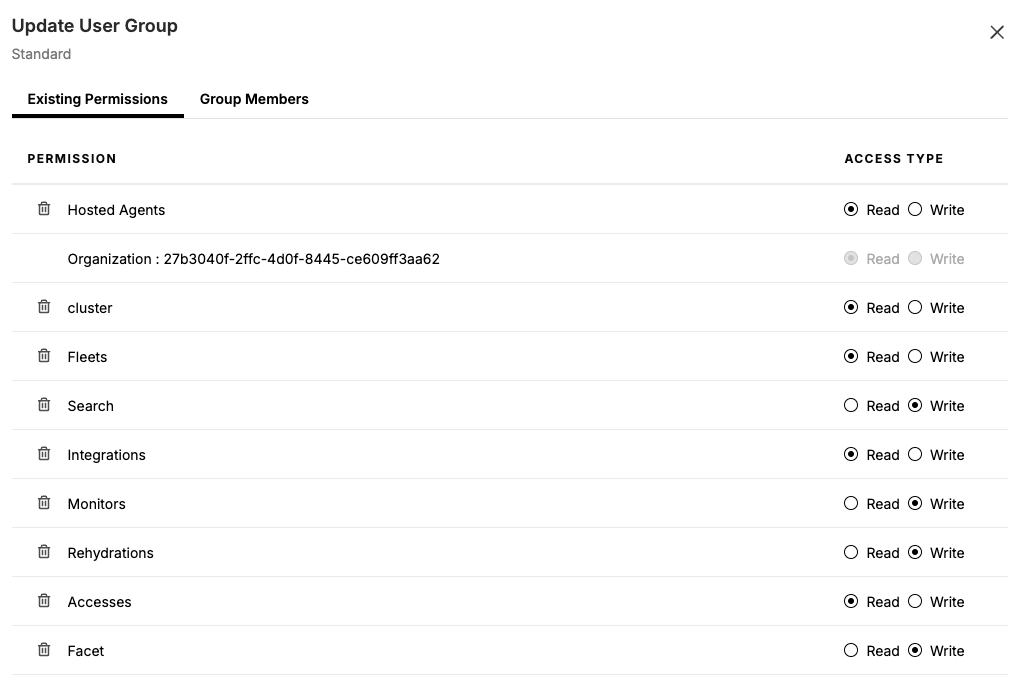
Permission Groups
By default, there are three permission groups:
- Admin: Write access to all resources.
- Analyst: Read-only access to all resources.
- Standard: Read-only access to most resources, with Write access to Facets, Rehydrations, Monitors, and Search.
Create a Group
You can create a user group with specific permissions.
- Click Admin - My Organization.
- Click Groups.
- Click Create User Group.
- Enter a descriptive name for the group.
- Click Create User Group.
- Click the icon in the Actions column for the newly created user group, click Edit user group.
- Click Add New Permissions.
- Under Select A Resource Type, click the drop-down menu, and then select the desired access type.
- Under Select Resources, select All Current and Future.
- For Access Type, select Read or Write. Read gives users the ability to view resource information, such as obtain a list of existing integrations. Write gives users the ability to create, edit, and remove resources, such as create a new integration or delete an existing monitor.
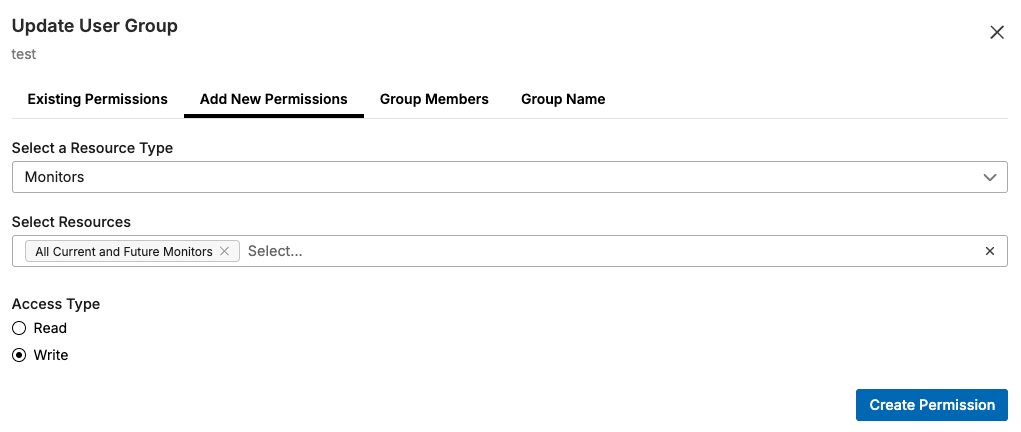
- Click Create Permission to add the permission to the group.
- (Optional) You can add multiple permissions to a group. Repeat steps 8 - 11.
- (Optional) To add existing users to this permission group, click Group Members, then select an existing user.
- Click Group Name then click Save.
Add a User to a Group
- Click Admin - My Organization.
- Click Groups.
- Click the icon in the Actions column for the appropriate group, click Edit User Group.
- Click Group Members.
- Select the user.
- Click Group Name then click Save.