Edge Delta HTTP Workflow Source
Configure HTTP Workflow sources to execute multi-step API orchestration with support for OAuth flows, conditional logic, iterators, and Redis caching.
20 minute read
Overview
The HTTP Workflow source chains multiple HTTP requests into a single pipeline node. Each step in the workflow can read data from previous steps, so you can authenticate with one API and then use the returned token to call another.
Common use cases include:
- Authenticate first, then fetch data — for example, get an OAuth token and pass it to a protected API
- Get a list, then fetch details for each item — fan-out to a detail endpoint for every item in a list response
- React to incoming webhooks — receive a webhook and enrich the payload with additional API calls
- Cache tokens or responses — store frequently used values in Redis to reduce API calls
Use the configuration wizard at the bottom of this page to generate a starter YAML configuration.
HTTP Workflow vs. HTTP Pull
| Use Case | Source |
|---|---|
| Single API endpoint, simple polling | HTTP Pull |
| Multiple dependent requests, OAuth, webhooks | HTTP Workflow (this page) |
If your integration only needs to call one endpoint on a schedule, HTTP Pull is simpler. Use HTTP Workflow when you need multiple requests that depend on each other.
- Outgoing data types: log
- Minimum version: v2.8.0
Quick Start: Your First Workflow
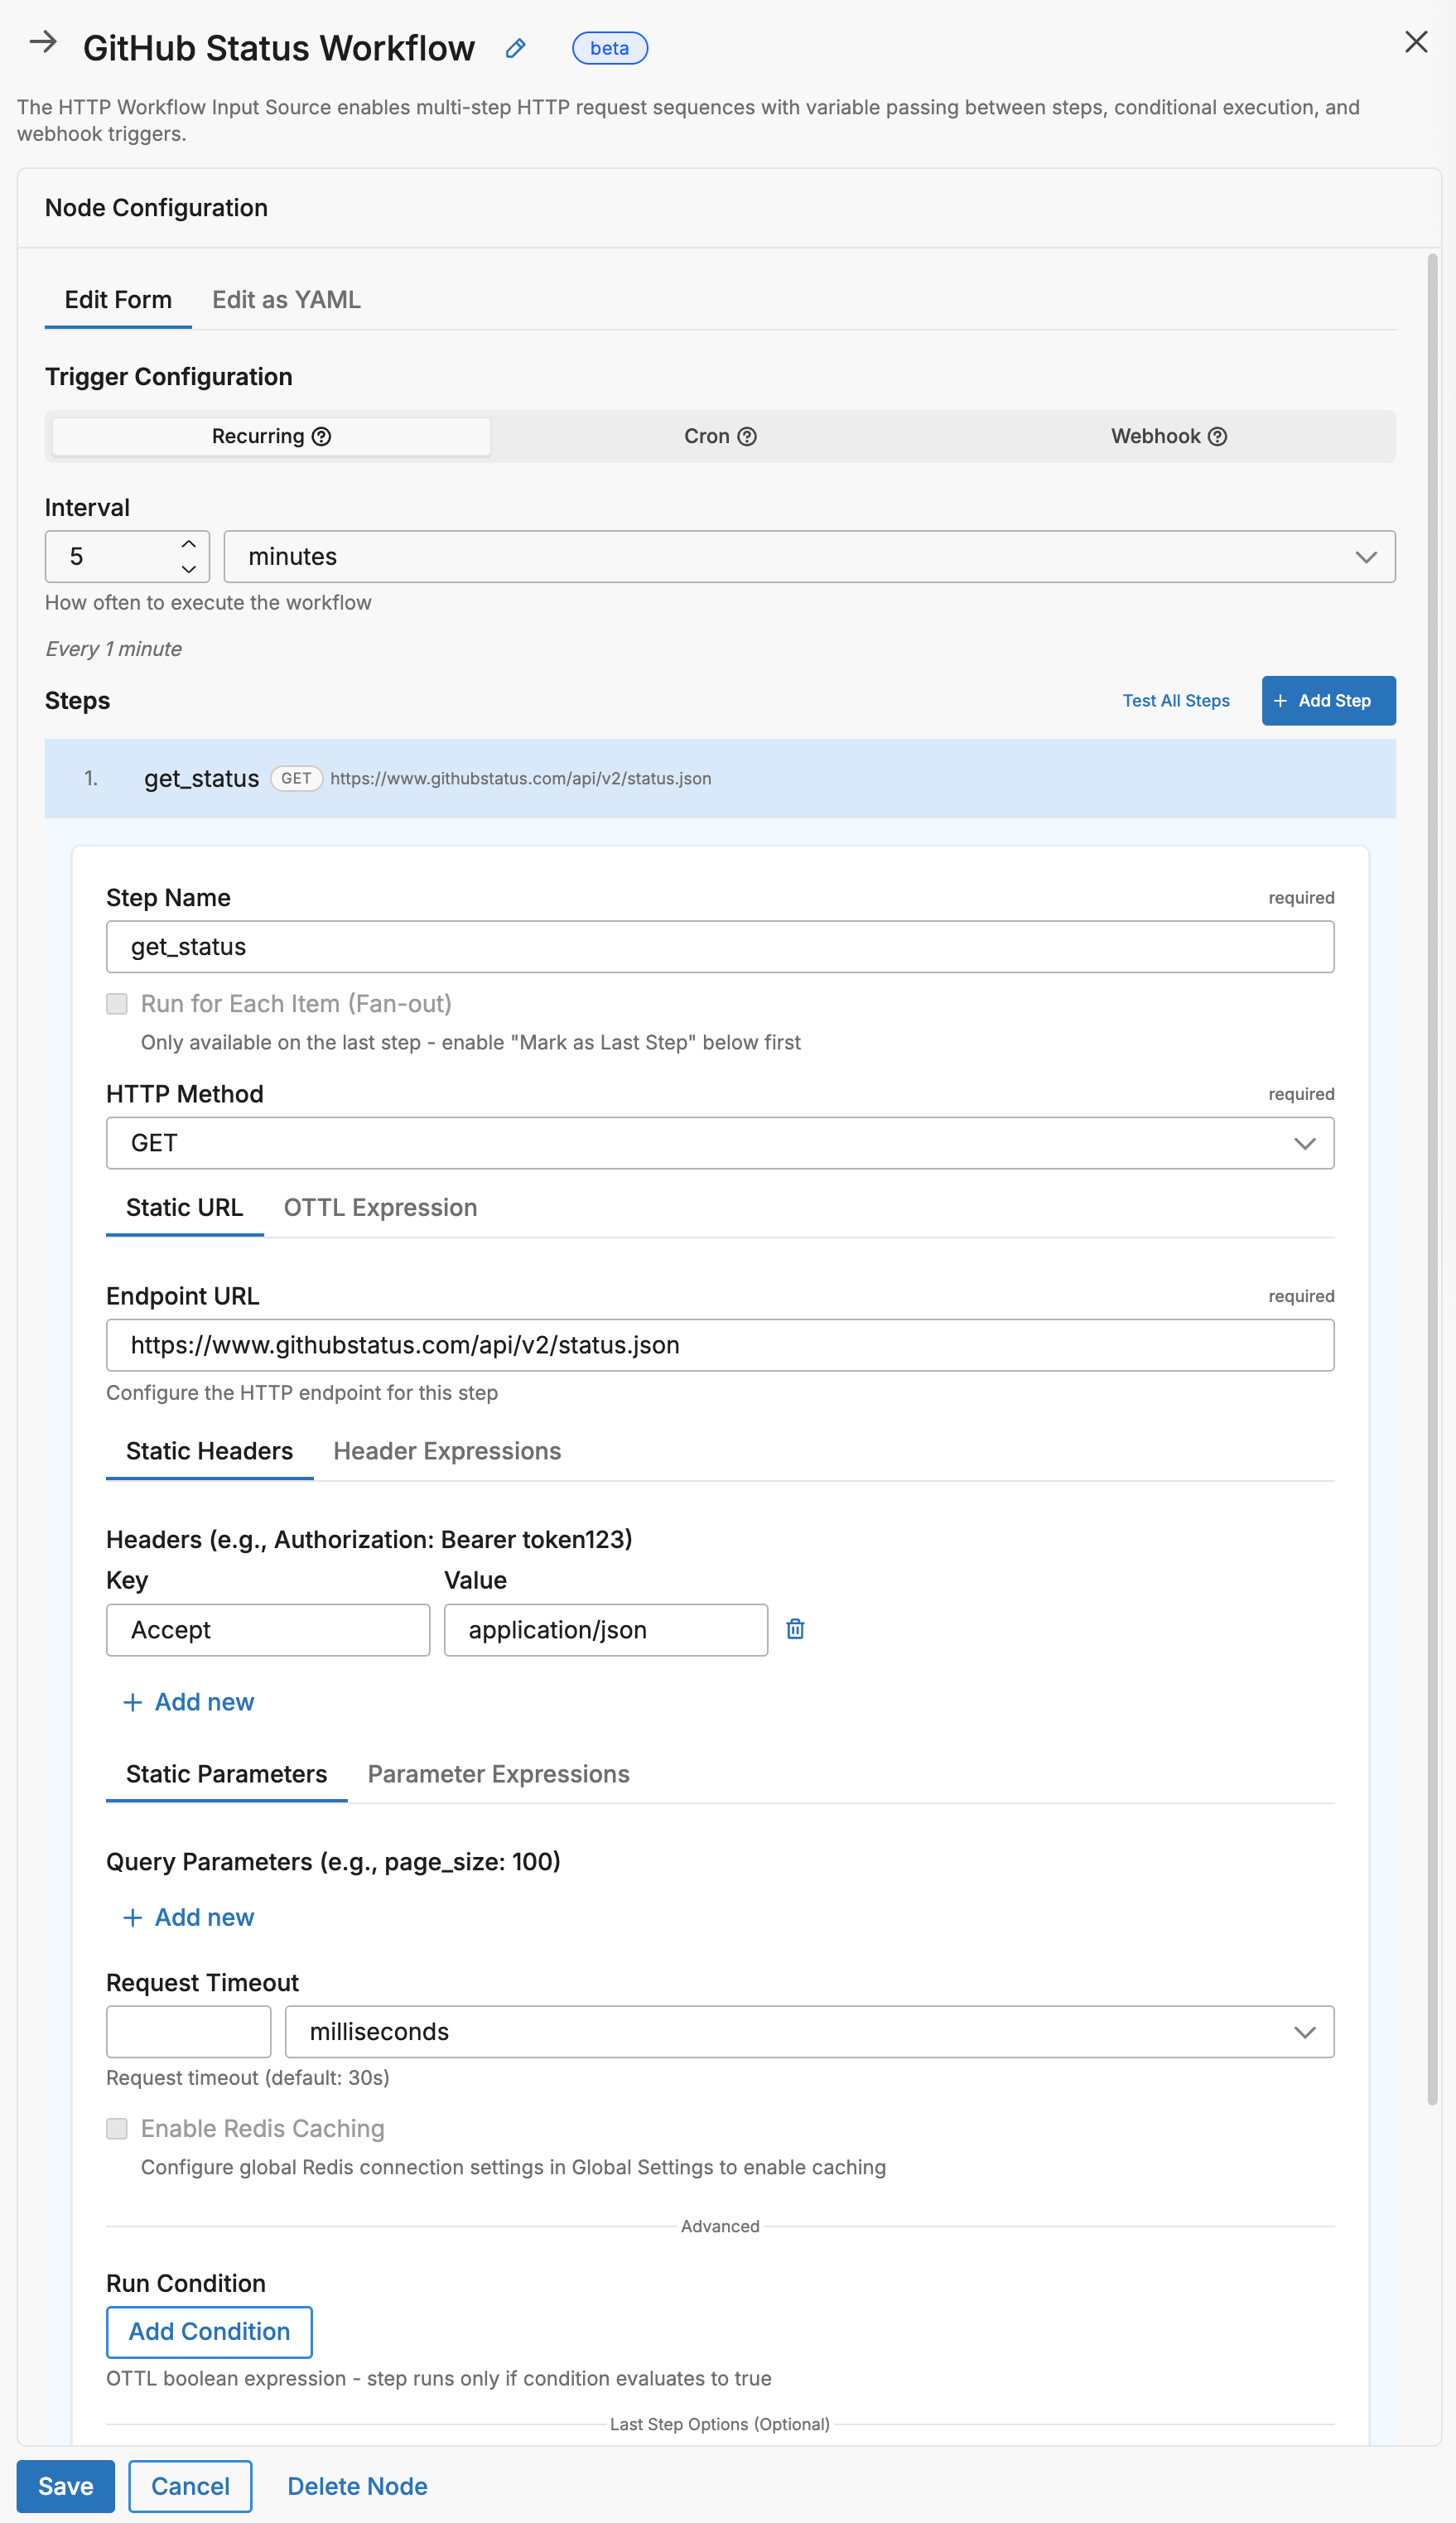
Poll a Public API
The simplest workflow has one step and a polling interval:
nodes:
- name: github_status
  type: http_workflow_input
  workflow_pull_interval: 5m
  steps:
    - name: get_status
      endpoint: https://www.githubstatus.com/api/v2/status.json
This workflow runs every 5 minutes, calls the GitHub status API, and emits the JSON response as a log item into your pipeline.
Add Authentication
Most APIs require authentication. Use the {{ SECRET name }} syntax to reference a secret stored in Edge Delta without exposing it in your configuration:
nodes:
- name: my_api_workflow
  type: http_workflow_input
  workflow_pull_interval: 5m
  steps:
    - name: fetch_data
      endpoint: https://api.example.com/v1/data
      headers:
        Authorization: "Bearer {{ SECRET api_token }}"
        Accept: application/json
In this example, {{ SECRET api_token }} is replaced at runtime with the value of a secret named api_token. Create and manage secrets in the Edge Delta app under Settings > Secrets.
Core Concepts
HTTP Workflow is built on three building blocks: a trigger that starts the workflow, a sequence of steps that make HTTP requests, and expressions that pass data between steps.
flowchart LR
classDef trigger fill:#E3F8EE,stroke:#1B7F5E,color:#0F3B2E;
classDef step fill:#E7F0FB,stroke:#2563EB,color:#1E3A8A;
classDef cache fill:#ECEBFF,stroke:#4338CA,color:#312E81;
classDef output fill:#FCEADB,stroke:#EA580C,color:#7C2D12;

    T["Trigger
(poll/schedule/webhook)"]
    S1["Step 1
HTTP Request"]
    S2["Step 2
Uses Step 1 Data"]
    SN["Step N
Final Request"]
    C[("Redis Cache
(optional)")]
    O["Emit Log"]

    T --> S1
    S1 --> S2
    S2 -.-> SN
    SN --> O
    C <-.-> S1
    C <-.-> S2
    C <-.-> SN

class T trigger;
class S1,S2,SN step;
class C cache;
class O output;
1. Triggers: What Starts the Workflow
Every workflow needs exactly one trigger that determines when it runs. Choose one of the following:
| Trigger | When to use | Configuration |
|---|---|---|
workflow_pull_interval | Run on a fixed schedule (e.g., every 5 minutes) | workflow_pull_interval: 5m |
workflow_pull_schedule | Run at specific times using a cron expression | workflow_pull_schedule: "0 9 * * 1-5" (weekdays at 9 AM) |
webhook | Run when an external system sends an HTTP request | Configure a webhook: block with a path and port |
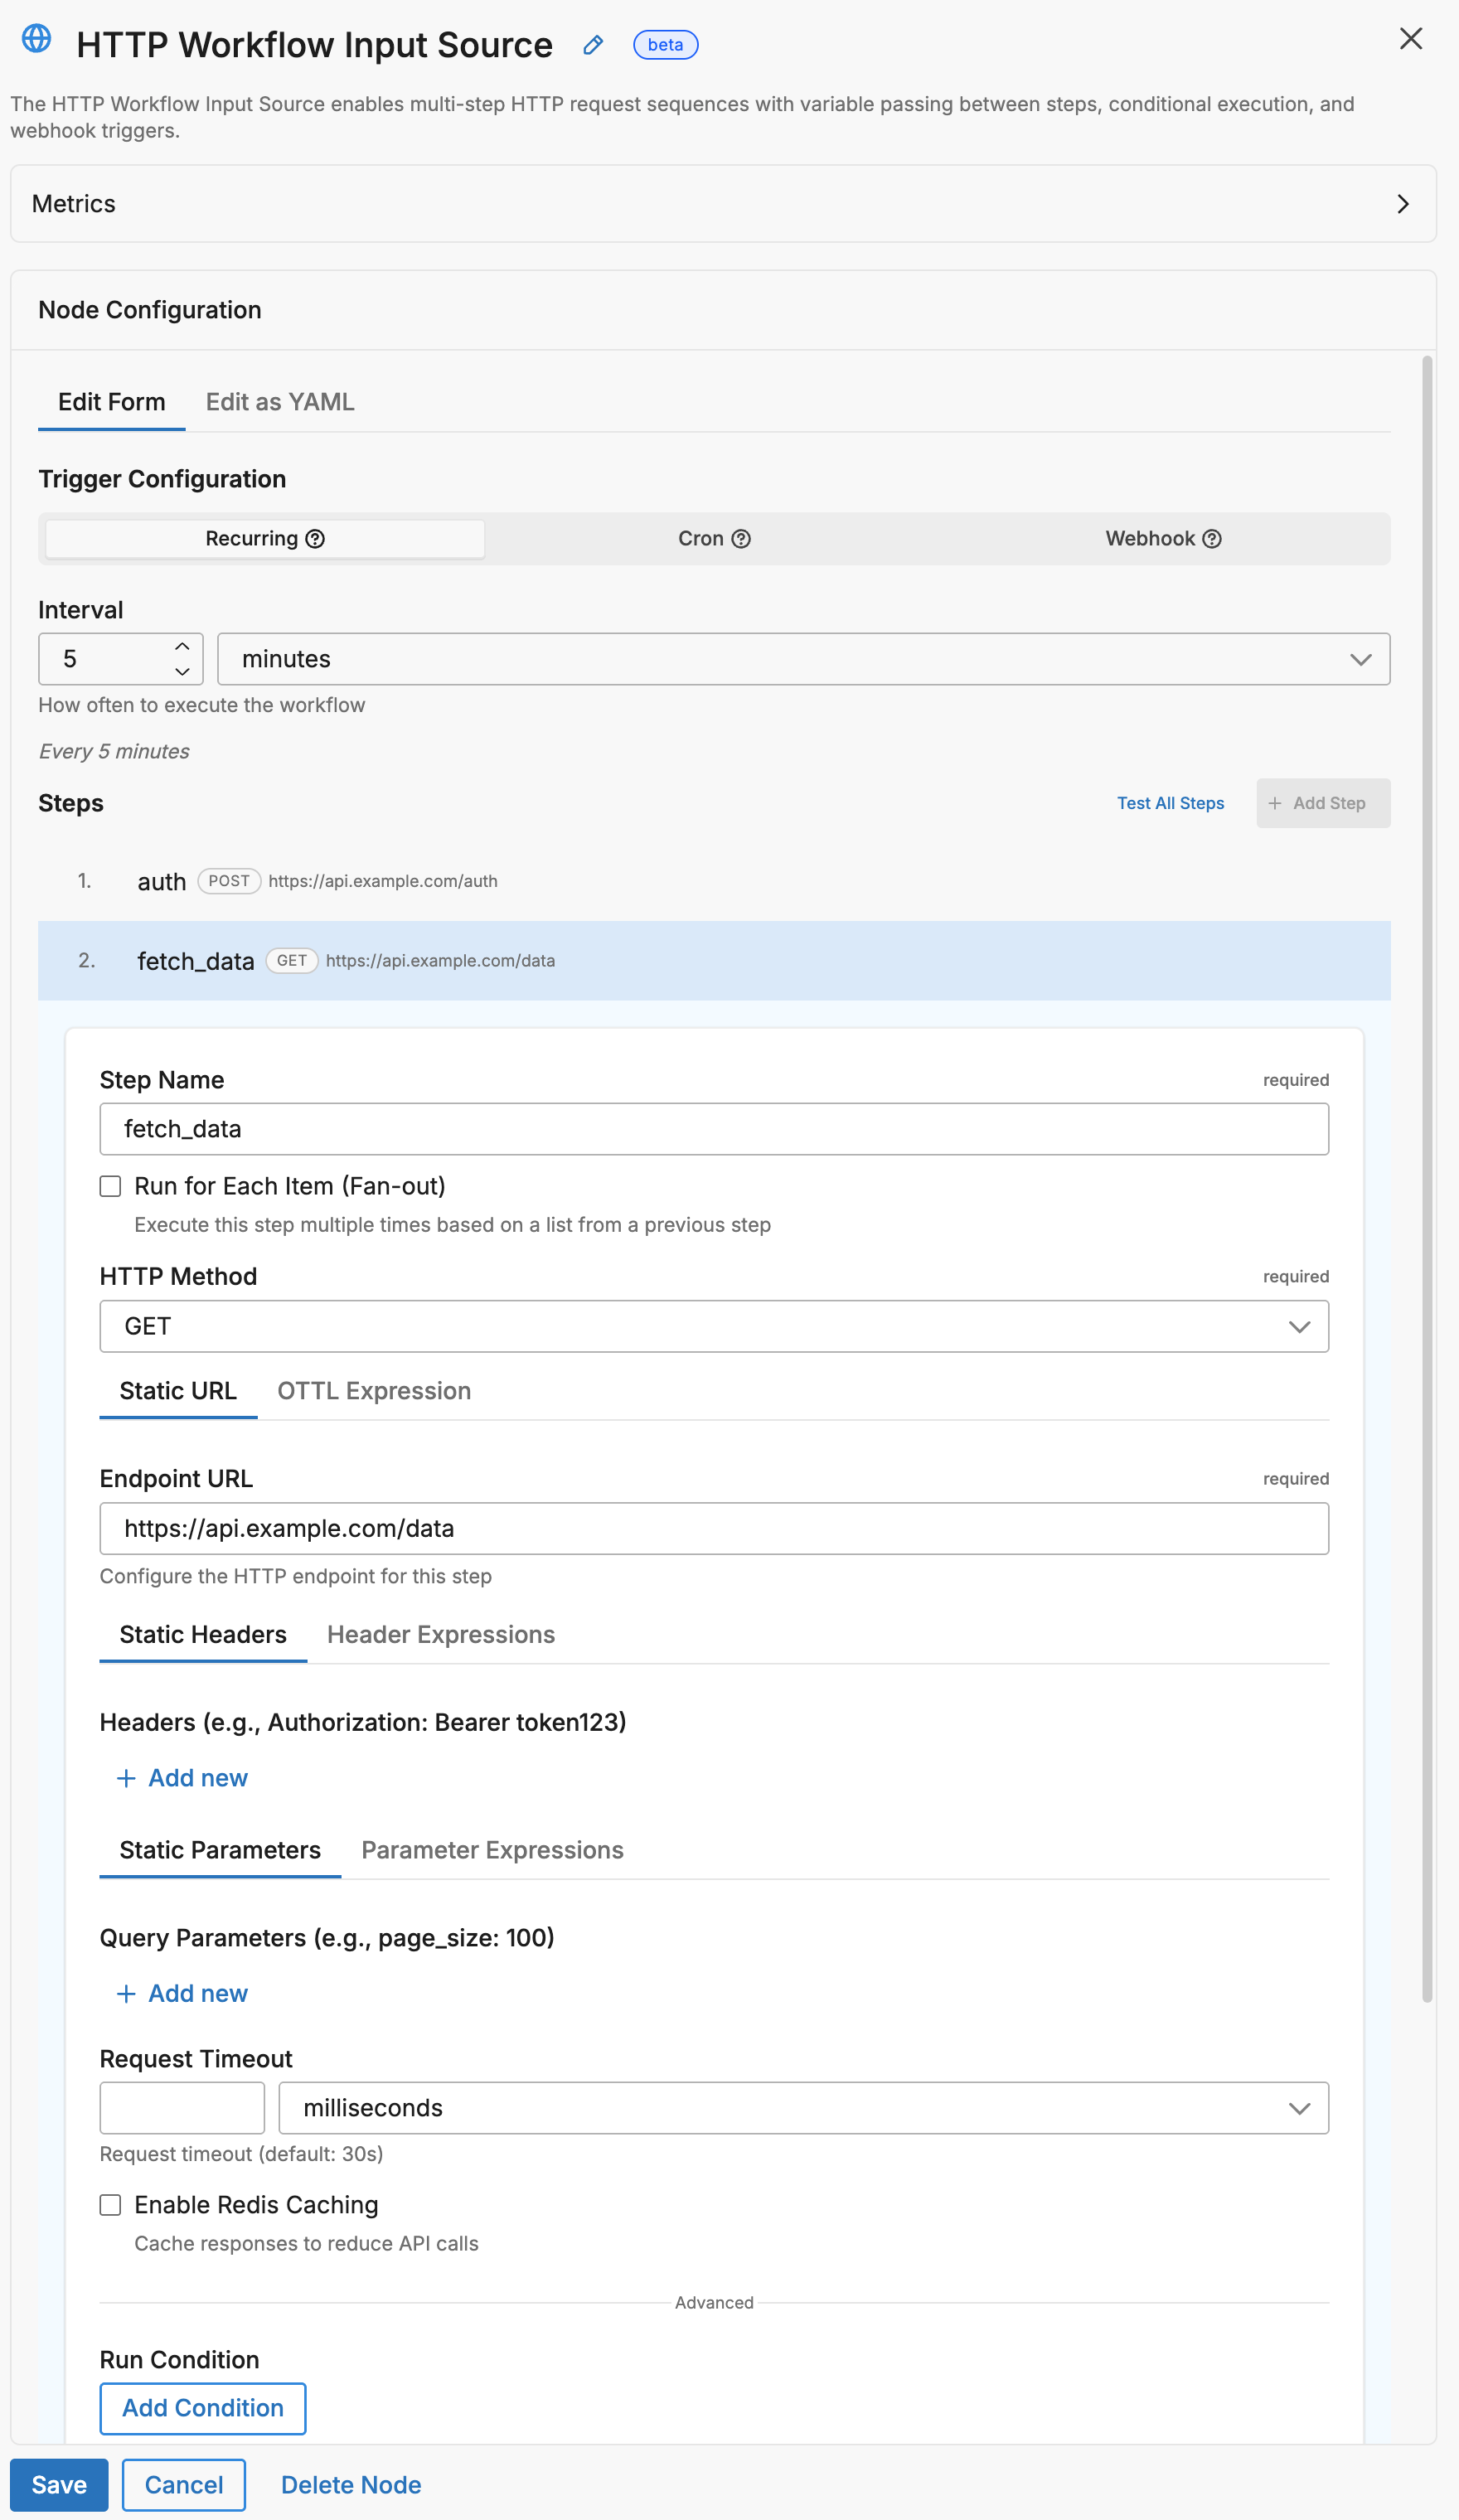
2. Steps: The Requests in Your Workflow
Each step defines one HTTP request. Steps run in order from top to bottom, and each step can read data returned by any step that ran before it.
steps:
  - name: step_one    # Runs first
    endpoint: https://api.example.com/auth

  - name: step_two    # Runs second — reads the token returned by step_one
    endpoint: https://api.example.com/data
    header_expressions:
      Authorization: Concat(["Bearer ", steps["step_one"]["response"]["token"]], "")
In this example, step_two builds its Authorization header dynamically using the token value from step_one’s response body.
Note: Step names must use
snake_casewith no spaces. Use underscores instead of spaces:get_user_listnotGet User List.
3. Expressions: Passing Data Between Steps
Later steps can read data from earlier steps using OTTL expressions. These expressions are used in fields like endpoint_expression, header_expressions, and request_body_expression to build dynamic values at runtime.
Every completed step stores its response in a steps array. You access a step’s data by referencing its name or its zero-based index (the first step is 0, the second is 1, and so on).
Accessing step results
| Data | Syntax | Concrete example |
|---|---|---|
| A field from the response body | steps["step_name"]["response"]["field_name"] | steps["auth"]["response"]["token"] — reads the token field from the auth step’s JSON response |
| The same field by step index | steps[0]["response"]["field_name"] | steps[0]["response"]["token"] — reads the token field from the first step’s response |
| The HTTP status code | steps["step_name"].status_code | steps["fetch"].status_code — returns 200, 404, etc. |
| A response header value | steps["step_name"].headers["header_name"] | steps["auth"].headers["x-request-id"] — reads the x-request-id header |
Accessing variables and environment values
| Data | Syntax | Concrete example |
|---|---|---|
A global variable defined in variables: | variables["key"] | variables["api_base"] — returns the value of api_base set in the node’s variables map |
| An environment variable with a fallback | EDXEnv("NAME", "default") | EDXEnv("API_KEY", "") — reads the API_KEY env var, or returns an empty string if unset |
Building dynamic strings with Concat
Use Concat to combine static text with expression values. The function takes an array of parts and a separator:
# Build a URL using a value from a previous step
endpoint_expression: Concat(["https://api.example.com/users/", steps["get_user"]["response"]["id"], "/profile"], "")

# Build an Authorization header using a token from step 1
header_expressions:
  Authorization: Concat(["Bearer ", steps["get_token"]["response"]["access_token"]], "")
The second argument ("") is the separator inserted between parts — an empty string means the parts are joined directly.
Warning: All expressions using
Concat,steps[], etc. must be written on a single line. Multi-line expressions fail validation.
Common Patterns
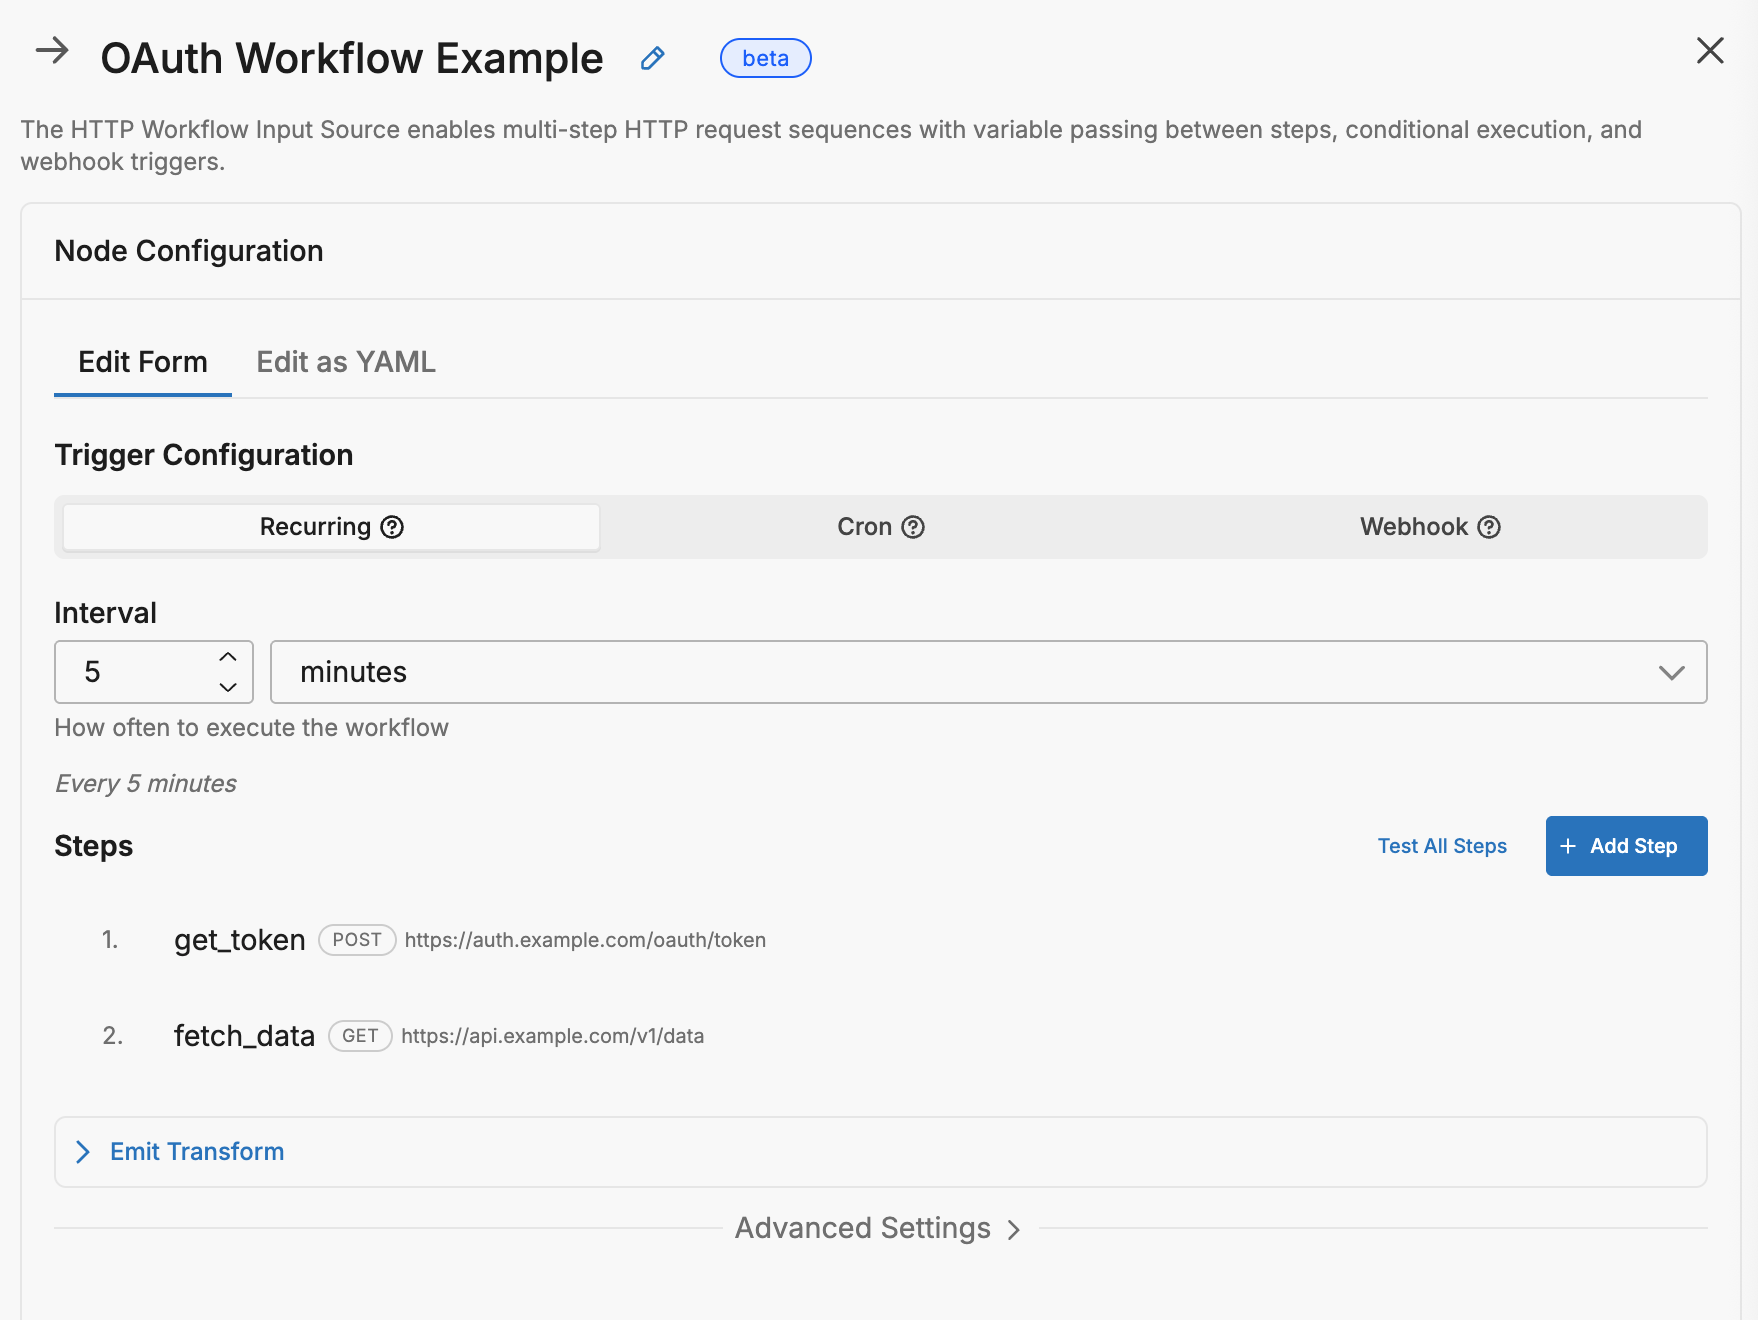
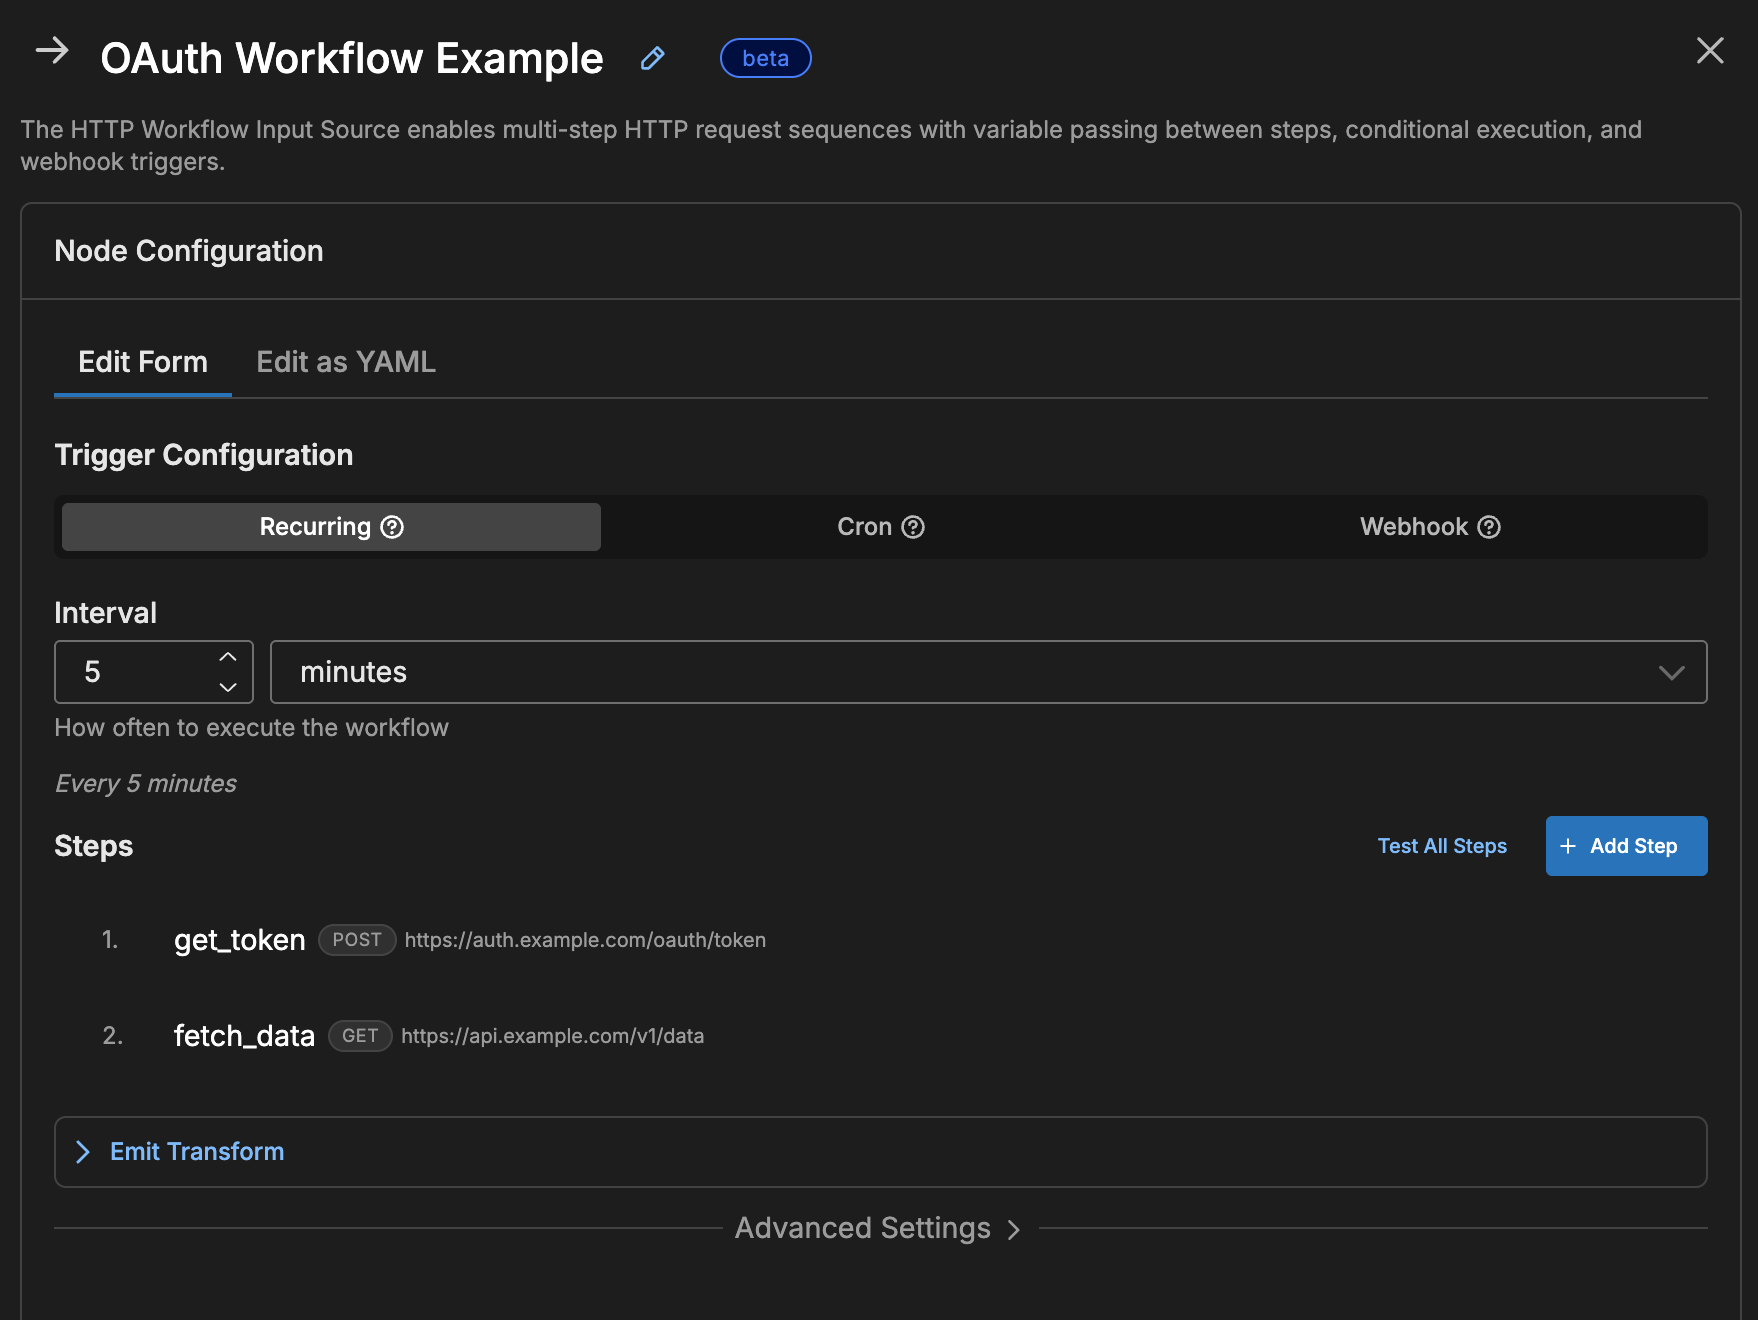
Pattern 1: OAuth Token + Data Fetch
Many APIs require an OAuth token before you can access data. This pattern uses two steps: the first step authenticates and receives a token, and the second step passes that token in an Authorization header to fetch the actual data. An optional Redis cache avoids re-authenticating on every run.
sequenceDiagram
    participant Agent as Edge Delta
    participant Redis as Redis Cache
    participant Auth as Auth Server
    participant API as Data API

    Agent->>Redis: Check for cached token
    alt Cache Hit
        Redis-->>Agent: Return cached token
    else Cache Miss
        Agent->>Auth: POST /oauth/token
        Auth-->>Agent: access_token
        Agent->>Redis: Cache token (TTL: 50m)
    end
    Agent->>API: GET /data + Bearer token
    API-->>Agent: Response data
nodes:
- name: oauth_workflow
  type: http_workflow_input
  workflow_pull_interval: 15m

  # Redis for token caching (optional but recommended)
  redis_address: "redis://localhost:6379"

  # Global variables for reuse (secrets resolved at runtime)
  variables:
    client_id: "{{ SECRET oauth_client_id }}"
    client_secret: "{{ SECRET oauth_client_secret }}"

  steps:
    # Step 1: Get OAuth token (cached for 50 minutes)
    - name: get_token
      endpoint: https://auth.example.com/oauth/token
      method: POST
      headers:
        Content-Type: application/x-www-form-urlencoded
      request_body_expression: Concat(["grant_type=client_credentials&client_id=", variables["client_id"], "&client_secret=", variables["client_secret"]], "")
      redis_cache:
        key_expression: '"oauth-token"'
        ttl: 50m
        check_before_request: true
        populate_on_success: true

    # Step 2: Fetch data using the token
    - name: fetch_data
      endpoint: https://api.example.com/v1/data
      header_expressions:
        Authorization: Concat(["Bearer ", steps["get_token"]["response"]["access_token"]], "")
Why cache the token?
- OAuth tokens typically last 1 hour
- Caching for 50 minutes avoids re-authenticating every request
- If cache is empty or expired, the HTTP request runs automatically
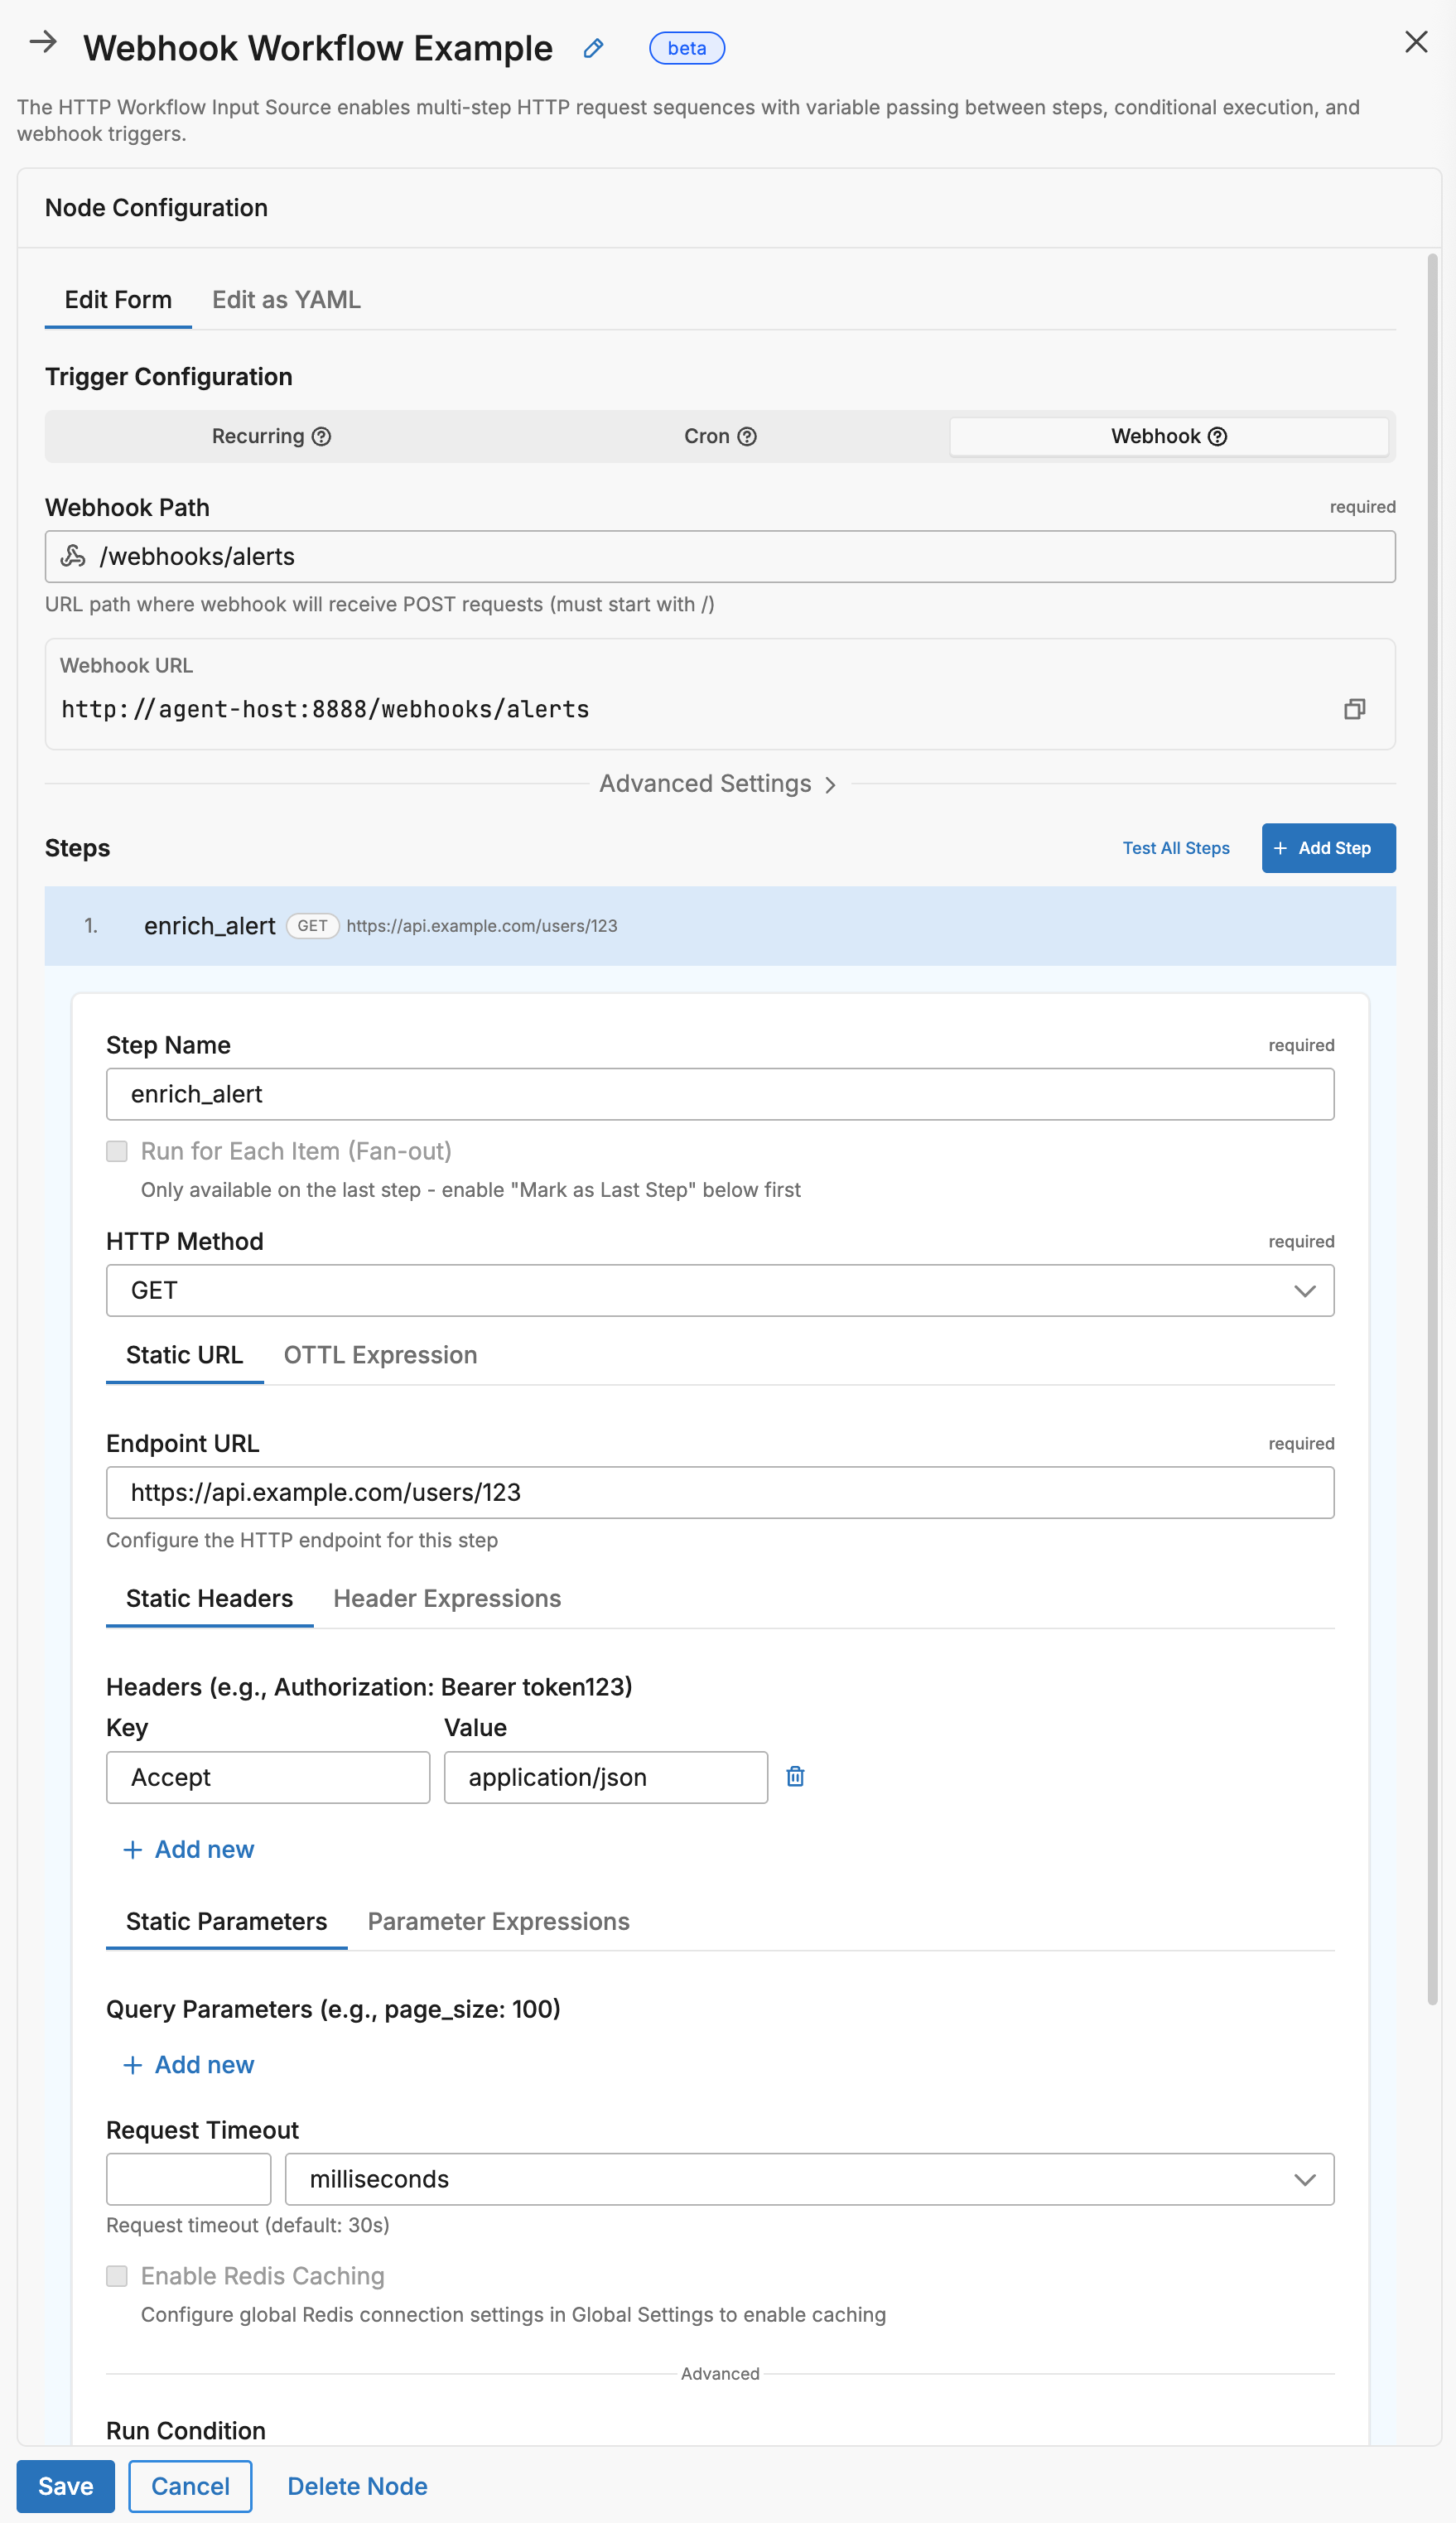
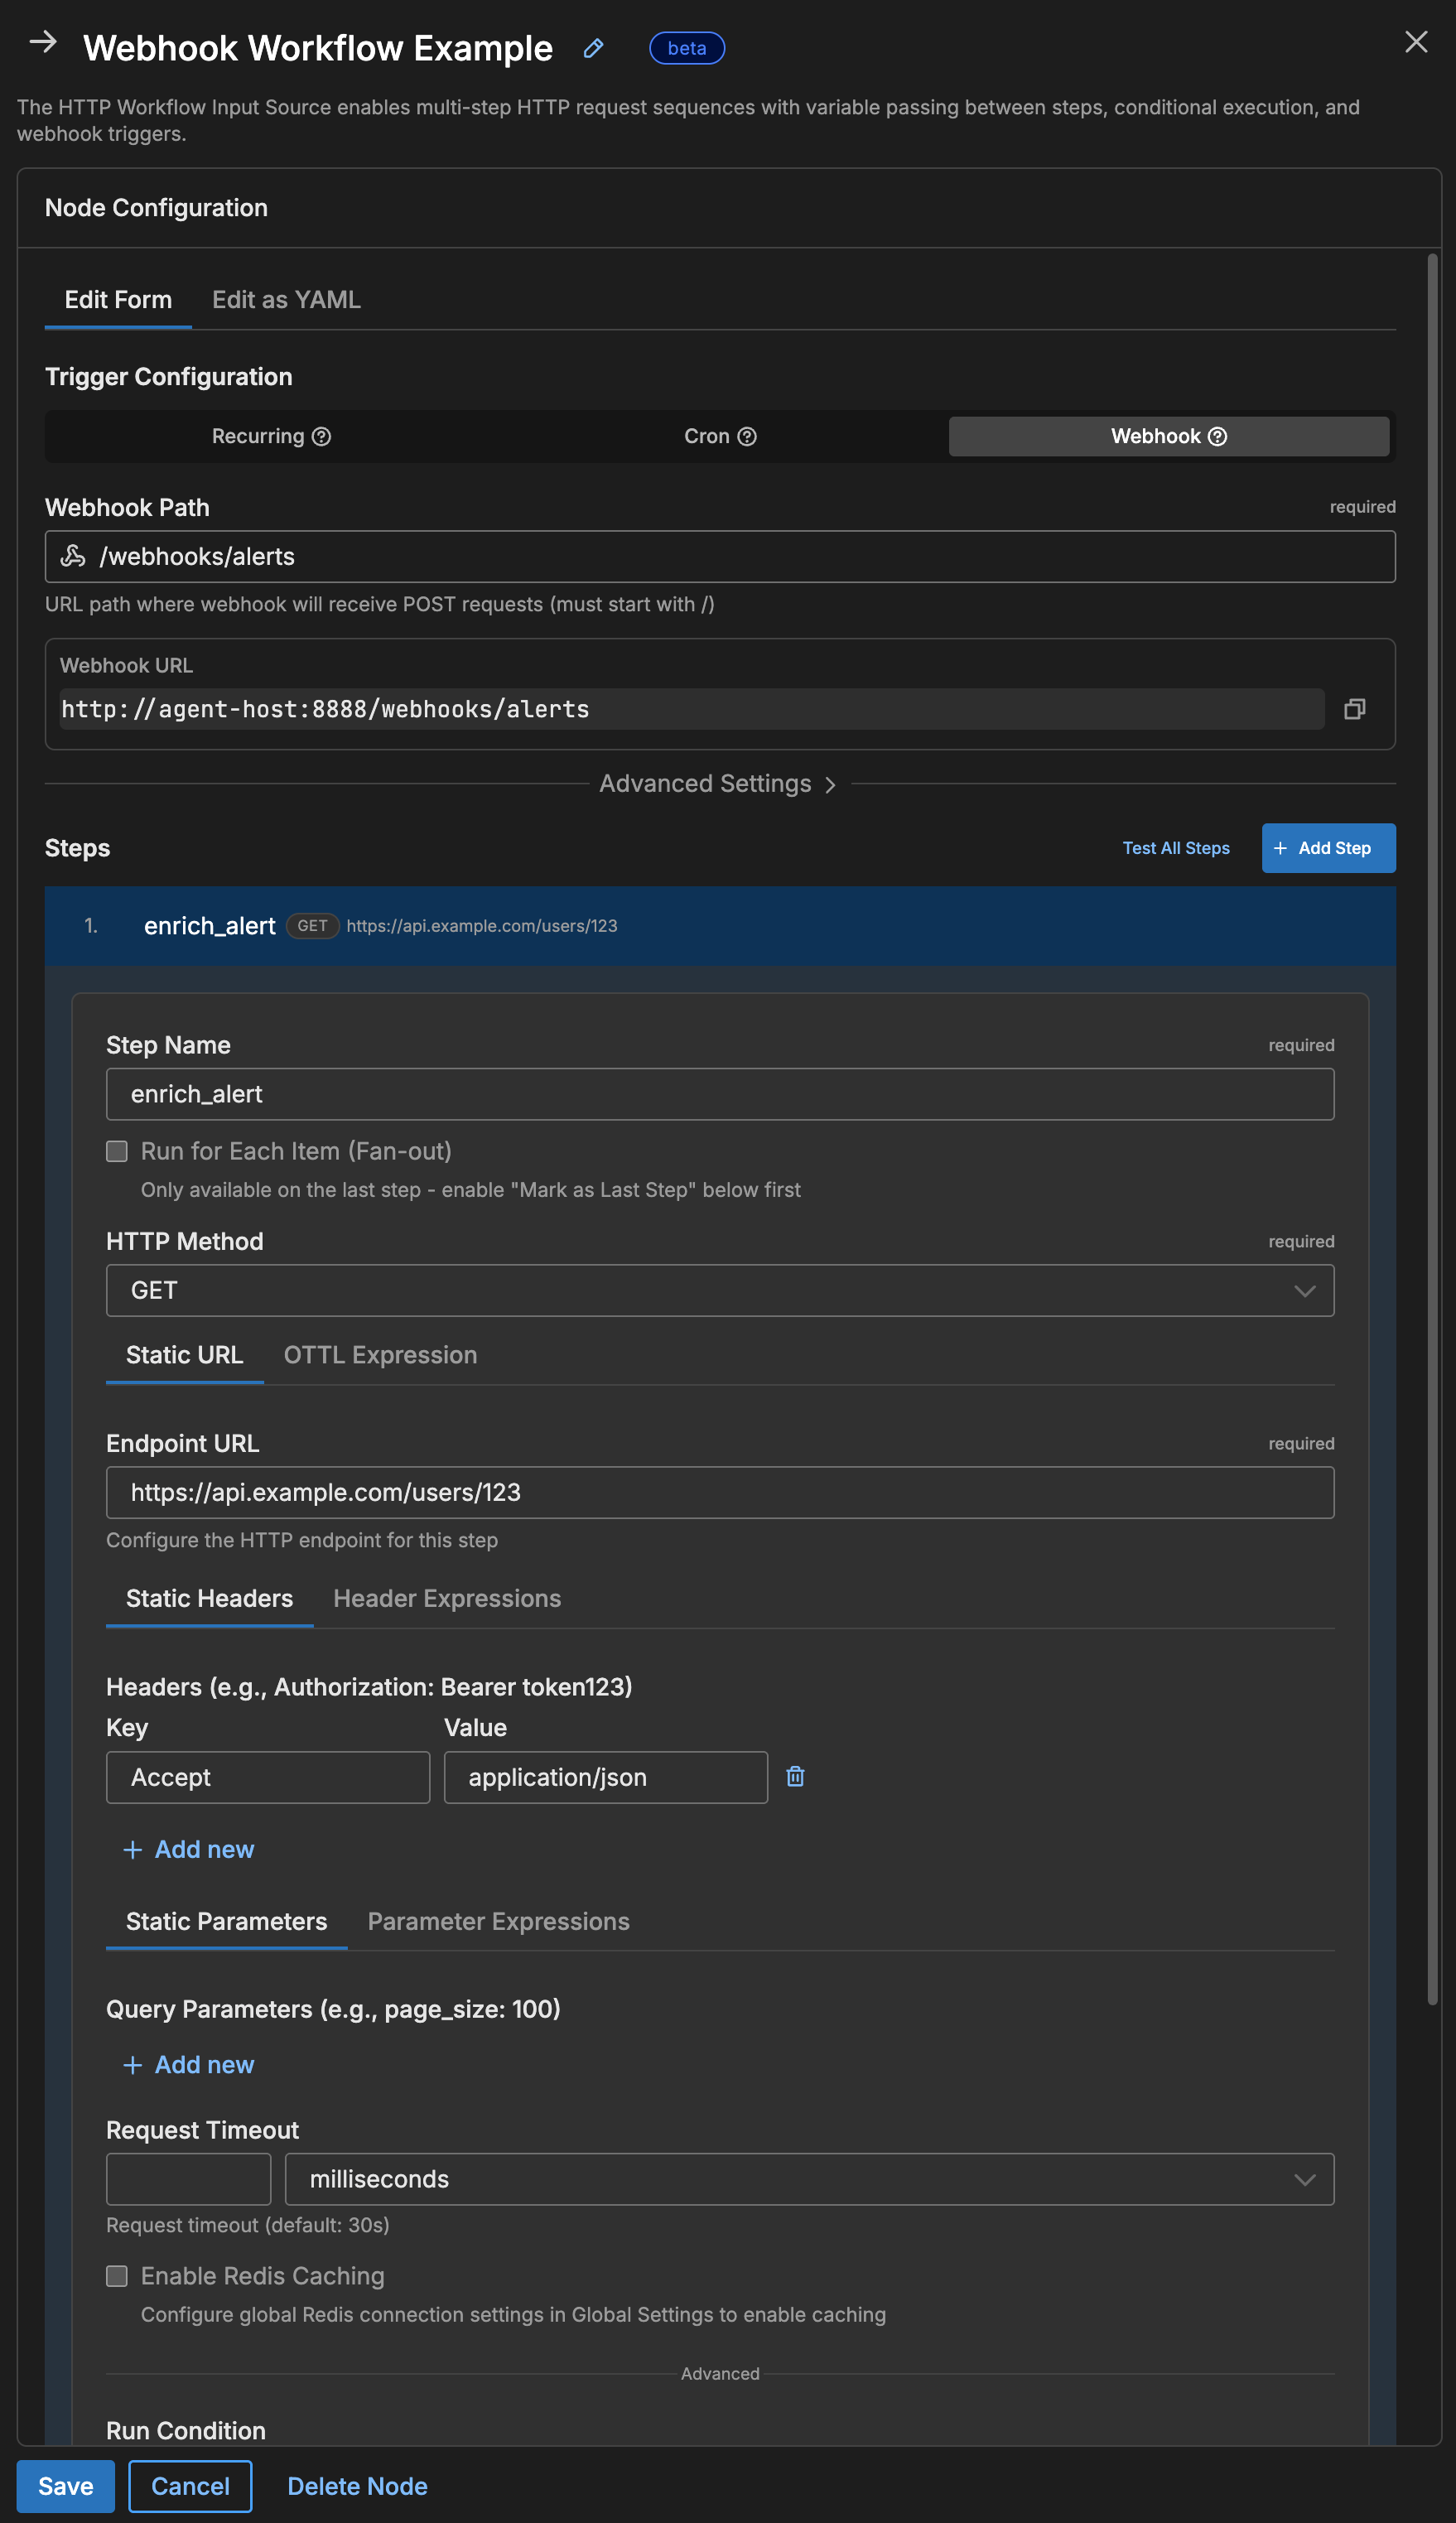
Pattern 2: Webhook-Triggered Processing
Instead of polling on a schedule, you can configure the workflow to listen for incoming HTTP requests. When an external system sends a webhook, the workflow runs its steps using the webhook payload as input. This is useful for event-driven integrations where you want to enrich or forward incoming data in real time.
flowchart LR
classDef external fill:#E3F8EE,stroke:#1B7F5E,color:#0F3B2E;
classDef security fill:#EAF4F3,stroke:#14532D,color:#0F3B2E;
classDef process fill:#E7F0FB,stroke:#2563EB,color:#1E3A8A;
classDef success fill:#E3F8EE,stroke:#1B7F5E,color:#0F3B2E;
classDef reject fill:#FEE2E2,stroke:#DC2626,color:#7F1D1D;

    WH["Webhook
Request"]
    RL{"Rate
Limit?"}
    AU{"Auth
Valid?"}
    S1["Enrich Data"]
    S2["Notify Slack"]
    OK["202 Accepted"]
    TM["429 Too Many"]
    UN["401 Unauthorized"]

    WH --> RL
    RL -->|OK| AU
    RL -->|Exceeded| TM
    AU -->|Yes| S1
    AU -->|No| UN
    S1 --> S2
    S2 --> OK

class WH external;
class RL,AU security;
class S1,S2 process;
class OK success;
class TM,UN reject;
nodes:
- name: alert_webhook
  type: http_workflow_input

  webhook:
    path: /webhooks/alerts
    port: 8888
    auth_type: bearer
    bearer_token: "{{ SECRET webhook_bearer_token }}"
    rate_limit_enabled: true
    rate_limit_max_per_min: 100

  steps:
    # Access webhook payload with webhook_payload["field"]
    - name: enrich_alert
      endpoint_expression: Concat(["https://api.example.com/users/", webhook_payload["user_id"]], "")
      headers:
        Authorization: "Bearer {{ SECRET api_token }}"

    - name: send_to_slack
      endpoint: "https://hooks.slack.com/services/{{ SECRET slack_webhook_path }}"
      method: POST
      headers:
        Content-Type: application/json
      request_body_expression: Concat(["{\"text\":\"Alert from ", steps["enrich_alert"]["response"]["username"], ": ", webhook_payload["message"], "\"}"], "")
Webhook authentication options:
| Auth Type | Configuration | Caller Sends |
|---|---|---|
bearer | bearer_token: "{{ SECRET webhook_token }}" | Authorization: Bearer <token> |
api_key | api_key: "{{ SECRET webhook_api_key }}", api_key_header: X-API-Key | X-API-Key: <key> |
hmac | hmac_secret: "{{ SECRET hmac_secret }}", hmac_header: X-Signature | HMAC signature of body |
none | (no config needed) | Nothing required |
Pattern 3: Fan-Out (Get List, Then Details)
A fan-out workflow fetches a list of items in one step, then iterates over that list to make a separate API call for each item. For example, you might fetch a list of user IDs and then call a profile endpoint for each one. The iterator configuration controls how many requests run in parallel.
flowchart TD
classDef list fill:#E3F8EE,stroke:#1B7F5E,color:#0F3B2E;
classDef split fill:#E9F5F4,stroke:#0F766E,color:#0F3B2E;
classDef item fill:#E7F0FB,stroke:#2563EB,color:#1E3A8A;
classDef merge fill:#E9F5F4,stroke:#0F766E,color:#0F3B2E;
classDef output fill:#FCEADB,stroke:#EA580C,color:#7C2D12;

    L["Get User List"]
    F{"Fan-Out
max_parallel: 10"}
    U1["User 1 Details"]
    U2["User 2 Details"]
    UN["User N Details"]
    M["Collect Results"]
    E["Emit Logs"]

    L --> F
    F --> U1 & U2 & UN
    U1 & U2 & UN --> M
    M --> E

class L list;
class F,M split;
class U1,U2,UN item;
class E output;
nodes:
- name: user_details_workflow
  type: http_workflow_input
  workflow_pull_interval: 30m

  steps:
    # Step 1: Get list of users
    - name: get_users
      endpoint: https://api.example.com/users?limit=50
      headers:
        Authorization: "Bearer {{ SECRET api_token }}"

    # Step 2: For each user, get their profile
    - name: get_profile
      endpoint_expression: Concat(["https://api.example.com/users/", iterator_item["id"], "/profile"], "")
      headers:
        Authorization: "Bearer {{ SECRET api_token }}"
      is_last_step: true
      iterator:
        source: steps["get_users"]["response"]["users"]
        variable_name: iterator_item
        max_parallel: 10
        continue_on_error: true
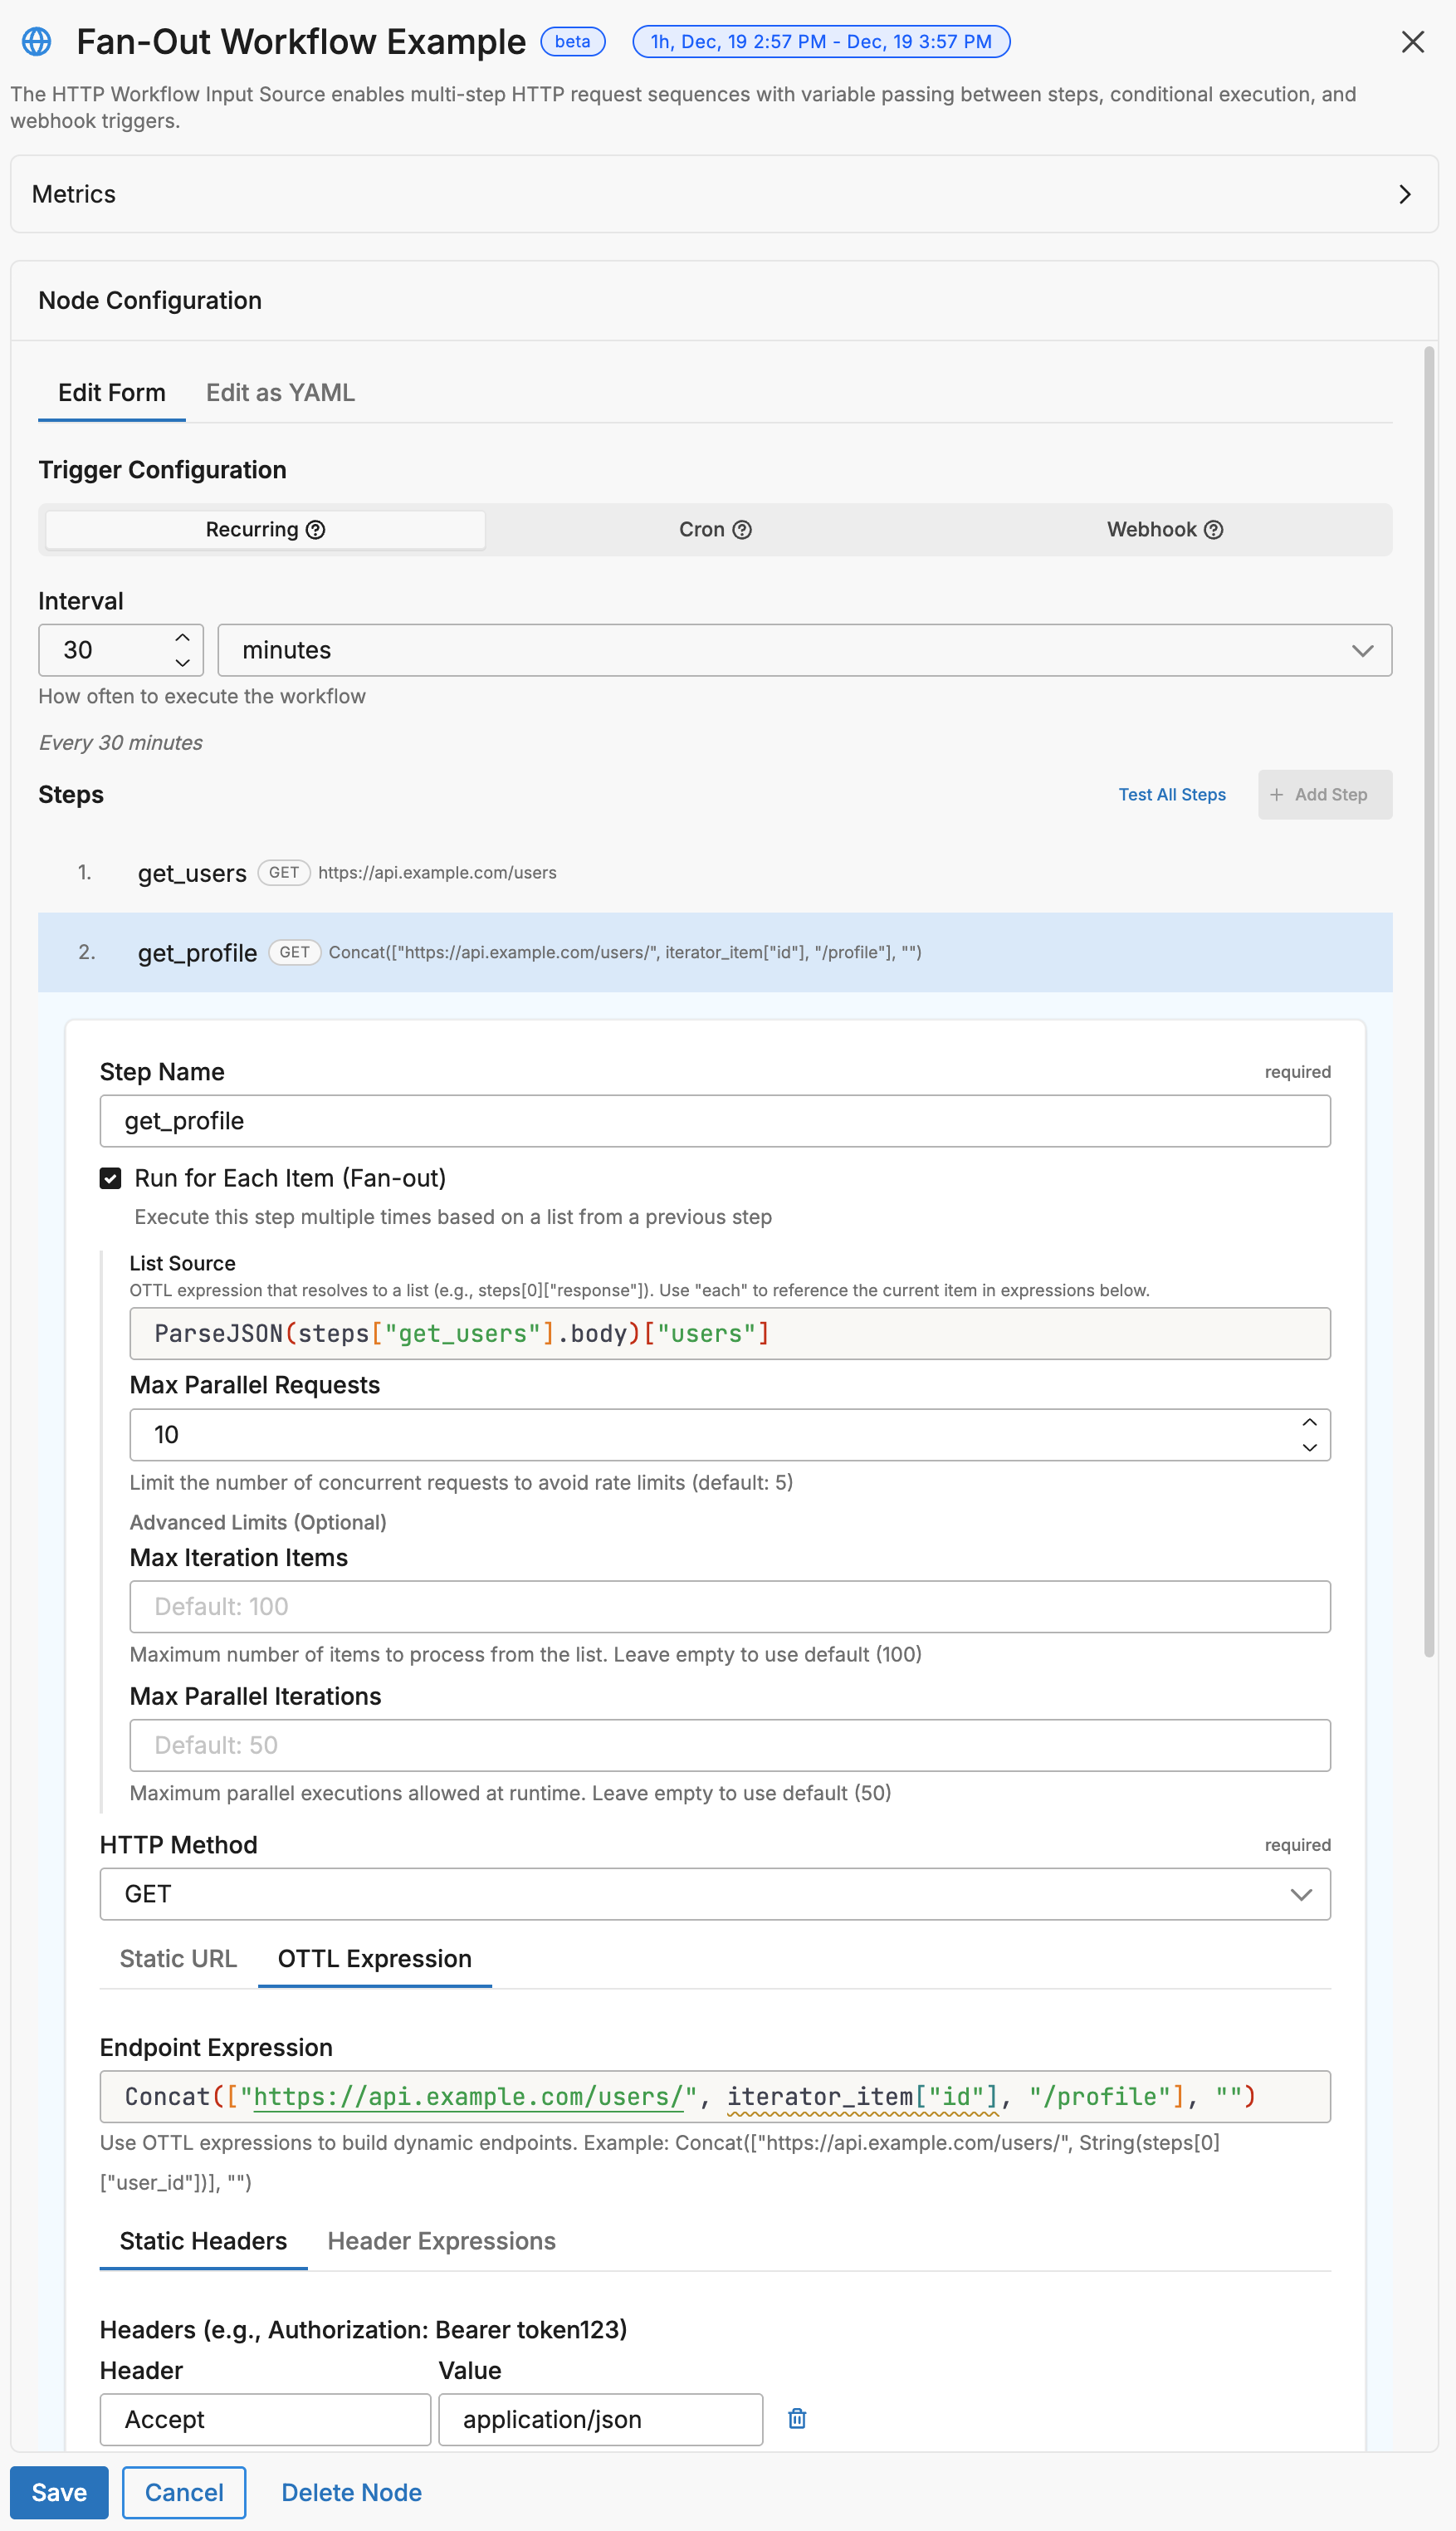
Inside an iterator step, these variables are available:
| Variable | Description |
|---|---|
iterator_item | The current item from the list. If the list contains objects, use iterator_item["field"] to access a specific field. |
iterator_index | The zero-based position of the current item (0, 1, 2, …). |
The default variable name is iterator_item, but you can change it with variable_name. For example, if you set variable_name: user, reference the current item as user["id"] instead of iterator_item["id"].
Warning: The variable name in your expressions must exactly match the
variable_nameyou configure. Mismatched names cause silent failures where the expression resolves tonil.
Warning: With
max_parallel: 10, the workflow makes 10 concurrent requests. If the target API has rate limits, lower this value or addretry_http_code: [429]so the agent retries when rate-limited.
Fan-Out with Per-Item Caching
You can combine fan-out with Redis caching so that each item gets its own cache entry. On subsequent runs, items that are already cached are served from Redis and only new or expired items trigger API calls.
flowchart TD
classDef list fill:#E3F8EE,stroke:#1B7F5E,color:#0F3B2E;
classDef cache fill:#ECEBFF,stroke:#4338CA,color:#312E81;
classDef api fill:#E7F0FB,stroke:#2563EB,color:#1E3A8A;
classDef skip fill:#F3F4F6,stroke:#9CA3AF,color:#6B7280;

    L["Get 100 Users"]
    F{"Fan-Out
100 items"}
    C1{"User 1
Cached?"}
    C2{"User 2
Cached?"}
    CN{"User N
Cached?"}
    HIT1["Use Cached"]
    HIT2["Use Cached"]
    API["Fetch from API"]
    SAVE["Cache Response"]

    L --> F
    F --> C1
    F --> C2
    F --> CN
    C1 -->|Hit| HIT1
    C2 -->|Hit| HIT2
    CN -->|Miss| API
    API --> SAVE

class L list;
class C1,C2,CN,SAVE cache;
class API api;
class HIT1,HIT2 skip;
nodes:
- name: cached_fan_out
  type: http_workflow_input
  workflow_pull_interval: 30m
  redis_address: "redis://localhost:6379"

  steps:
    - name: get_users
      endpoint: https://api.example.com/users
      headers:
        Authorization: "Bearer {{ SECRET api_token }}"

    - name: get_profile
      endpoint_expression: Concat(["https://api.example.com/users/", iterator_item["id"], "/profile"], "")
      headers:
        Authorization: "Bearer {{ SECRET api_token }}"
      is_last_step: true
      iterator:
        source: steps["get_users"]["response"]["users"]
        variable_name: iterator_item
        max_parallel: 10
      # Cache each user's profile by their ID
      redis_cache:
        key_expression: Concat(["user-profile-", iterator_item["id"]], "")
        ttl: 1h
        check_before_request: true      # Check cache first
        populate_on_success: true       # Cache new responses
Result: On the first run, all 100 profiles are fetched. On subsequent runs within the TTL, only new/changed users trigger API calls—cached profiles are reused.
Pattern 3b: Caching Expensive API Calls
If an API is rate-limited, slow, or charges per call, use Redis caching to reduce how often the workflow makes requests. When a cached response exists and has not expired, the agent uses the cached value and skips the HTTP call entirely.
flowchart LR
classDef check fill:#FEF3C7,stroke:#D97706,color:#78350F;
classDef cache fill:#ECEBFF,stroke:#4338CA,color:#312E81;
classDef api fill:#E7F0FB,stroke:#2563EB,color:#1E3A8A;
classDef cost fill:#FEE2E2,stroke:#DC2626,color:#7F1D1D;

    REQ["Workflow
Triggered"]
    CHK{"Cache
Valid?"}
    HIT["Use Cached
FREE"]
    MISS["Call API
$0.01"]
    SAVE[("Save to
Cache")]

    REQ --> CHK
    CHK -->|Hit| HIT
    CHK -->|Miss| MISS
    MISS --> SAVE

class CHK check;
class HIT,SAVE cache;
class MISS cost;
nodes:
- name: expensive_api_workflow
  type: http_workflow_input
  workflow_pull_interval: 5m           # Check every 5 minutes
  redis_address: "redis://localhost:6379"

  steps:
    # This API costs $0.01 per call - cache for 1 hour
    - name: fetch_expensive_data
      endpoint: https://api.expensive-service.com/data
      headers:
        Authorization: "Bearer {{ SECRET expensive_api_key }}"
      redis_cache:
        key_expression: '"expensive-data-cache"'
        ttl: 1h                         # Cache for 1 hour
        check_before_request: true      # Always check cache first
        populate_on_success: true       # Store successful responses

    # This API is rate-limited to 10 req/min - cache for 5 minutes
    - name: fetch_rate_limited
      endpoint: https://api.strict-limits.com/metrics
      headers:
        Authorization: "Bearer {{ SECRET metrics_api_key }}"
      redis_cache:
        key_expression: '"metrics-cache"'
        ttl: 5m
        check_before_request: true
        populate_on_success: true
Cost savings example:
| Scenario | API Calls/Day | Cost @ $0.01/call |
|---|---|---|
| No caching (every 5 min) | 288 | $2.88 |
| 1-hour cache | 24 | $0.24 |
| Savings | 264 calls | $2.64/day |
Pattern 4: Conditional Execution
Use run_condition to control whether a step runs based on the results of a previous step. If the condition evaluates to false, the step is skipped and the workflow continues to the next step.
steps:
  - name: check_status
    endpoint: https://api.example.com/status

  # Only runs if status is "active"
  - name: fetch_active_data
    endpoint: https://api.example.com/active-data
    run_condition: steps["check_status"]["response"]["status"] == "active"

  # Only runs if status is NOT "active"
  - name: send_alert
    endpoint: https://alerts.example.com/webhook
    method: POST
    run_condition: steps["check_status"]["response"]["status"] != "active"
    request_body: '{"message": "Service is not active"}'
Pattern 5: State Persistence (Markers/Cursors)
You can persist state between workflow runs using Redis-only steps — steps that interact with Redis but make no HTTP request. This lets you remember where you left off between runs. Common use cases include:
- Pagination cursors — store the last page or offset so the next run picks up where the previous one stopped
- Timestamps — record the timestamp of the most recent record so you only fetch new data
- Deduplication — track processed record IDs to avoid duplicates
flowchart LR
classDef redis fill:#ECEBFF,stroke:#4338CA,color:#312E81;
classDef api fill:#E7F0FB,stroke:#2563EB,color:#1E3A8A;
classDef output fill:#FCEADB,stroke:#EA580C,color:#7C2D12;

    R1[("Redis
Read Marker")]
    API["Fetch Records
since: marker"]
    R2[("Redis
Save New Marker")]
    OUT["Emit Logs"]

    R1 -->|"last_timestamp"| API
    API --> R2
    API --> OUT
    R2 -.->|"next run"| R1

class R1,R2 redis;
class API api;
class OUT output;
nodes:
- name: incremental_sync
  type: http_workflow_input
  workflow_pull_interval: 5m
  redis_address: "redis://localhost:6379"

  steps:
    # Step 1: Read last processed timestamp from Redis (no HTTP call)
    - name: get_marker
      redis_cache:
        key_expression: '"last-sync-timestamp"'
        check_before_request: true

    # Step 2: Fetch new records since the marker
    - name: fetch_new_records
      endpoint: https://api.example.com/records
      parameter_expressions:
        since: steps["get_marker"]["response"]
        limit: '"100"'
      headers:
        Authorization: "Bearer {{ SECRET api_token }}"

    # Step 3: Save the new marker to Redis (no HTTP call)
    - name: save_marker
      redis_cache:
        key_expression: '"last-sync-timestamp"'
        value_expression: steps["fetch_new_records"]["response"]["latest_timestamp"]
        populate_on_success: true
        ttl: 720h  # 30 days
How Redis-only steps work:
| Step Type | Configuration | Behavior |
|---|---|---|
| Read marker | check_before_request: true, no endpoint | Reads value from Redis, available as steps["name"]["response"] |
| Write marker | populate_on_success: true + value_expression, no endpoint | Writes computed value to Redis |
Note: Steps with
redis_cacheconfigured but noendpointare Redis-only steps. They don’t make HTTP calls—they only interact with Redis. Usevalue_expressionto specify what to store.
Redis Caching
Redis caching stores API responses so the workflow can reuse them on subsequent runs without making another HTTP call. This is especially important for OAuth tokens, which are expensive to request but can be reused for the duration of their validity period.
flowchart TD
classDef decision fill:#FEF3C7,stroke:#D97706,color:#78350F;
classDef action fill:#E7F0FB,stroke:#2563EB,color:#1E3A8A;
classDef cache fill:#ECEBFF,stroke:#4338CA,color:#312E81;
classDef terminal fill:#E3F8EE,stroke:#1B7F5E,color:#0F3B2E;

    START(["Step Begins"])
    CHECK{"check_before_request?"}
    LOOKUP["Lookup Cache Key"]
    HIT{"Cache Hit?"}
    USE["Use Cached Response"]
    EXEC["Execute HTTP Request"]
    POP{"populate_on_success?"}
    STORE["Store in Cache"]
    DONE(["Continue Workflow"])

    START --> CHECK
    CHECK -->|No| EXEC
    CHECK -->|Yes| LOOKUP
    LOOKUP --> HIT
    HIT -->|Yes| USE
    HIT -->|No| EXEC
    USE --> DONE
    EXEC --> POP
    POP -->|Yes| STORE
    POP -->|No| DONE
    STORE --> DONE

class CHECK,HIT,POP decision;
class LOOKUP,EXEC action;
class USE,STORE cache;
class START,DONE terminal;
Quick Setup
nodes:
- name: cached_workflow
  type: http_workflow_input
  workflow_pull_interval: 5m

  # Global Redis connection
  redis_address: "redis://localhost:6379"
  redis_password: "{{ SECRET redis_password }}"  # Optional
  redis_tls: false

  steps:
    - name: cached_request
      endpoint: https://api.example.com/data
      redis_cache:
        key_expression: '"my-cache-key"'      # Cache key (must evaluate to string)
        ttl: 10m                               # Cache duration
        check_before_request: true             # Check cache first
        populate_on_success: true              # Store response on success


Cache Configuration Reference
| Field | Type | Description |
|---|---|---|
key_expression | string | OTTL expression for cache key |
ttl | duration | Time-to-live (5m, 1h, 720h, etc.) |
check_before_request | bool | If true, check cache before HTTP request |
populate_on_success | bool | If true, cache response after successful request |
value_expression | string | OTTL expression for value to store (required for Redis-only SET steps) |
skip_remaining_on_hit | bool | If true, skip all remaining steps on cache hit |
Complete Reference
Node-Level Parameters
| Parameter | Type | Required | Default | Description |
|---|---|---|---|---|
name | string | Yes | - | Unique node identifier |
type | string | Yes | - | Must be http_workflow_input |
steps | array | Yes | - | List of HTTP request steps |
workflow_pull_interval | duration | One trigger required | 1m | Polling interval |
workflow_pull_schedule | string | One trigger required | - | Cron expression |
webhook | object | One trigger required | - | Webhook configuration |
global_timeout | duration | No | 2m | Max workflow execution time |
emit_intermediate | bool | No | false | Emit logs for non-final steps |
variables | map | No | - | Global variables for all steps |
redis_address | string | No | - | Redis connection string |
redis_password | string | No | - | Redis password |
redis_username | string | No | - | Redis username (for ACL-based auth) |
redis_tls | bool | No | false | Enable TLS for Redis |
redis_db | int | No | 0 | Redis database number |
redis_deployment_type | string | No | - | Redis deployment type (e.g., sentinel) |
redis_sentinel_master | string | No | - | Sentinel master name (when using Sentinel) |
redis_validate_certs | bool | No | true | Validate Redis TLS certificates |
redis_ca_cert_path | string | No | - | Path to CA certificate for Redis TLS |
redis_cert_path | string | No | - | Path to client certificate for Redis mTLS |
redis_key_path | string | No | - | Path to client key for Redis mTLS |
redis_server_name | string | No | - | Expected server name for Redis TLS verification |
Step-Level Parameters
| Parameter | Type | Required | Default | Description |
|---|---|---|---|---|
name | string | Yes | - | Unique step identifier (use snake_case, no spaces) |
endpoint | string | One required | - | Static URL |
endpoint_expression | string | One required | - | Dynamic URL via OTTL |
method | string | No | GET | HTTP method |
headers | map | No | - | Static headers |
header_expressions | map | No | - | Dynamic headers via OTTL |
parameters | map | No | - | Query parameters |
parameter_expressions | map | No | - | Dynamic query params via OTTL |
request_body | string | No | - | Static request body |
request_body_expression | string | No | - | Dynamic body via OTTL |
request_timeout | duration | No | 30s | Timeout for this step |
run_condition | string | No | - | OTTL condition to execute step |
retry_http_code | array[int] | No | - | HTTP codes that trigger retry |
iterator | object | No | - | Fan-out configuration |
redis_cache | object | No | - | Caching configuration |
is_last_step | bool | No | false | Mark as terminal step |
Webhook Configuration
| Field | Type | Default | Description |
|---|---|---|---|
path | string | Required | URL path (e.g., /webhooks/alerts) |
port | int | 8080 | HTTP server port |
auth_type | string | none | none, bearer, api_key, hmac |
bearer_token | string | - | Token for bearer auth |
api_key | string | - | Key for API key auth |
api_key_header | string | X-API-Key | Header name for API key |
hmac_secret | string | - | Secret for HMAC validation |
hmac_header | string | X-Webhook-Signature | Header with HMAC signature |
rate_limit_enabled | bool | false | Enable rate limiting |
rate_limit_max_per_min | int | 60 | Max requests per minute |
Iterator Configuration
| Field | Type | Default | Description |
|---|---|---|---|
source | string | Required | OTTL expression returning array |
variable_name | string | iterator_item | Name for current item |
max_parallel | int | 10 | Concurrent iterations |
continue_on_error | bool | false | Continue if iteration fails |
Security
Built-in SSRF Protection
HTTP Workflow blocks requests to:
- Localhost (
127.0.0.1,::1,localhost) - Private IPs (
10.x,172.16-31.x,192.168.x) - Cloud metadata (
169.254.169.254) - Non-HTTP schemes (
file://,ftp://)
Credential Best Practices
# DO: Use Edge Delta secrets (recommended)
headers:
  Authorization: "Bearer {{ SECRET api_token }}"

# DO: Use EDXEnv for environment variables
header_expressions:
  Authorization: Concat(["Bearer ", EDXEnv("API_TOKEN", "")], "")

# DON'T: Hardcode secrets
headers:
  Authorization: Bearer sk_live_abc123  # Never do this!
Note: Create secrets in the Edge Delta app: Settings > Secrets. Use lowercase names with underscores (e.g.,
api_token,oauth_client_secret).
Troubleshooting
Debugging Workflow Execution
By default, only the final step’s response is emitted as a log item. If your workflow isn’t producing the expected output, these techniques help you see what each step is doing.
1. Enable Emit Intermediate Responses
Set emit_intermediate: true to emit the response from every step, not just the last one. This makes it easier to identify which step is failing or returning unexpected data:
nodes:
- name: my_workflow
  type: http_workflow_input
  emit_intermediate: true    # Emit data from all steps
  steps:
    - name: step_one
      endpoint: https://api.example.com/auth
    - name: step_two
      endpoint: https://api.example.com/data
In the UI, toggle Emit Intermediate Responses under Advanced Settings.
2. Add Debug Attributes
Use emit_transform to attach the full workflow state to each emitted log. This adds all step responses and variable values as attributes you can inspect in the Edge Delta app:
nodes:
- name: my_workflow
  type: http_workflow_input
  emit_transform:
    - set(attributes["debug_steps"], steps)
    - set(attributes["debug_vars"], variables)
  steps:
    # ...
This adds debug_steps and debug_vars attributes to your output, showing the complete state of all steps and variables at emit time.
No Data Retrieved
- Verify endpoint is accessible: Test with
curlfirst - Check authentication: Ensure secrets/env vars are set correctly
- Review step names: Names are case-sensitive and must use
snake_case - Enable emit_intermediate: See if earlier steps are succeeding
- Enable debug logging:
log:
  level: debug
Token Not Being Cached
- Verify Redis is reachable:
redis-cli ping - Check
check_before_request: trueis set - Ensure
key_expressionevaluates to a string - Confirm TTL is less than token expiry
Iterator Not Working
- Check variable name: Ensure the variable used in expressions matches
variable_nameexactly - Verify source returns an array: Use
ParseJSON()if needed, and ensure it returns an array not an object - Check previous step: The step providing data must complete successfully
- Enable emit_intermediate: Verify the list step is returning expected data
- Try
continue_on_error: truefor partial success
Webhook Not Receiving Requests
- Check port availability:
lsof -i:8888 - Verify firewall allows incoming connections
- Confirm auth headers match configuration
- Check agent logs for
401or429responses
Testing Your Workflow
Before deploying a workflow, verify that each endpoint is reachable and returns the expected response by testing with curl:
# Test OAuth endpoint
curl -X POST "https://auth.example.com/oauth/token" \
  -H "Content-Type: application/x-www-form-urlencoded" \
  -d "grant_type=client_credentials&client_id=<YOUR_CLIENT_ID>&client_secret=<YOUR_CLIENT_SECRET>"

# Test data endpoint with token
curl "https://api.example.com/data" \
  -H "Authorization: Bearer <YOUR_ACCESS_TOKEN>"

# Test webhook locally
curl -X POST "http://localhost:8888/webhooks/test" \
  -H "Authorization: Bearer <YOUR_WEBHOOK_SECRET>" \
  -H "Content-Type: application/json" \
  -d '{"event": "test", "user_id": "123"}'
Configuration Wizard
Use this interactive wizard to generate a starter configuration:
How should the workflow be triggered?
Choose what starts your multi-step API workflow. You need exactly one trigger.
See Also
- HTTP Pull Source — Single-request HTTP polling
- OTTL Language Guide — Complete expression reference