Manage Edge Delta Users and Groups
4 minute read
Invite a User to your Organization
Select the Users tab to manage your current organization’s membership. When you invite a user, they will join the organization that you are current logged into. To invite a user to a different organization, you must switch organizations, and then invite the user from the selected organization.
- Click Admin and select the My Organization tab.
- Click Invite User.
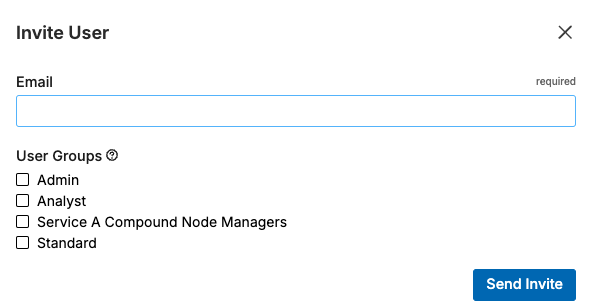
- Enter their email.
- Select a permissions group for the user.
- Click Send Invite.
The invited user will receive an email with a link to join. If the invited user is already a member of another organization, then they can switch between accounts.
Membership Requests
When a user requests to join your organization, their request will be listed on the Membership Requests tab.
Groups
Select the Groups tab to manage your current organization’s groups permissions.
Permission Groups
By default, there are three permission groups:
- Admin: Write access to all resources.
- Analyst: Read-only access to all resources.
- Standard: Read-only access to most resources, with Write access to Facets, Rehydrations, Monitors, and Search.
Resource Types
When configuring permissions for a group, you can grant Read or Write access to the following resource types:
| Resource | Description |
|---|---|
| Accesses | User and group management. Controls the ability to invite users, create groups, and manage permissions. Similar to IAM access in AWS. |
| Dashboards | Custom dashboards for visualizing data. |
| Demo templates | Pre-built demonstration templates for onboarding and evaluation. |
| Facet | Facet configurations for filtering and categorizing data. |
| Hosted agents | Cloud-hosted Edge Delta agents managed by Edge Delta. |
| Integrations | Legacy integrations. For newer integration types, configure pipeline destinations. |
| Lookup tables | Lookup tables used for data enrichment and transformation. |
| Monitors | Alert monitors and notification configurations. |
| Node references | References to pipeline nodes. This is a work-in-progress feature. |
| Packs | Pre-built configuration packs for common use cases. |
| Pipelines | Pipeline configurations. Read access allows viewing pipelines; Write access allows creating and editing pipelines. |
| Pipelines deployment | Pipeline deployment operations. Controls the ability to deploy pipeline changes to agents. |
| Rehydrations | Archive rehydration jobs for retrieving historical data from cold storage. |
| Search | Log search functionality. |
Create a Group
You can create a user group with specific permissions.
- Click Admin and select the My Organization tab.
- Click the Groups tab.
- Click Create User Group.
- Enter a descriptive name for the group.
- Click Create User Group.
Add Permissions to a Group
After creating a group, you need to specify what permissions the group has.
- In the list of groups, click the kebab menu icon and select Edit User Group.
- Click the Add New Permissions tab.
- Under Select A Resource Type, select a resource type from the dropdown menu. See Resource Types for descriptions of each resource.
- Under Select Resources, choose one of the following:
- All Current and Future: Grants access to all resources of this type, including any created in the future.
- Specific resource: Select individual resources, such as a particular pipeline.
- For Access Type, select Read or Write:
- Read: View resource information, such as listing existing integrations or viewing pipeline configurations.
- Write: Create, edit, and delete resources.
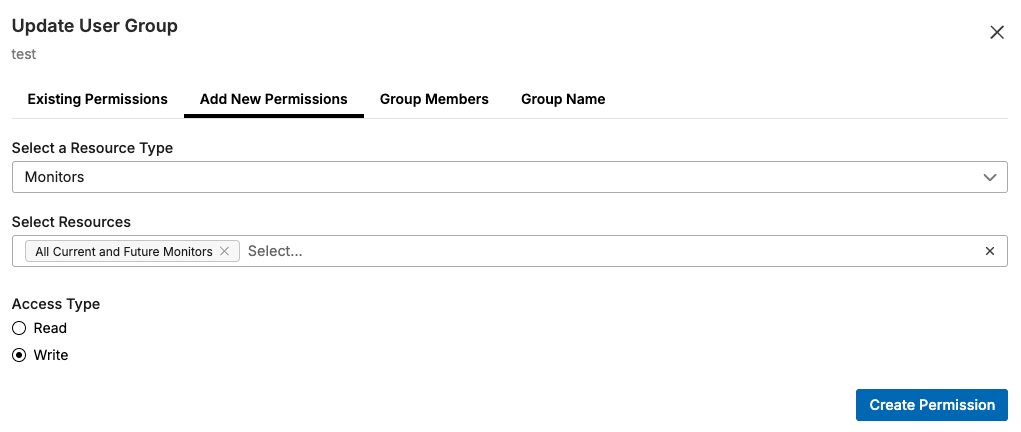
- Click Create Permission to add the permission to the group.
- (Optional) To add multiple permissions, repeat steps 2-6.
- Close the dialog box.
Add a User to a Group
- Click Admin and select the My Organization tab.
- Click the Groups tab.
- Click the kebab menu icon for the appropriate group and select Edit User Group.
- Click the Group Members tab.
- Select a user from the list to add them to the group.
- Close the dialog box.
Removing Admin Permissions
To remove regular permissions from a user when JIT is enabled, simply remove them from the permissions group in your IDP. However, to remove admin permissions from a user, you must remove them using the IDP and also remove them from the Admin group in Edge Delta. This helps prevent accidental account lockout. To remove an admin user:
- Remove admin permissions from the user in the IDP (if JIT is enabled.)
- In the Edge Delta app, click Admin - My Organization.
- Click Groups.
- Click the Actions column button in the Admin row and select Edit User Group.
- Click Group Members.
- Click the Delete button on the user you want to remove from the Admin group.