Ingest Data from a File
3 minute read
Overview
The Edge Delta agent begins to ingest logs from stdout out of the box. However, you can specify alternative or additional inputs. The File source node captures log input from specific files. It does this by tailing the configured files and capturing the changes made to them. The changes are sent as logs into the pipeline as they arrive in the file. The file source node is useful when dealing with system logs that are written to flat files on disk. It also serves as a valuable tool for testing and troubleshooting purposes.
System logs are commonly written to flat files on disk. If the logs are not already being sent over the network, it is simpler to ingest them from the file than set up a new process to send them over TCP or HTTP.
Prerequisites
To use a file source node you need the following prerequisites:
- An Edge Delta account with a pipeline configuration already created. This is the configuration in which you will create the File source node.
- An in-cluster volume where the logs are being saved, and the cluster might need to be configured to mount external files depending on your architecture.
1. Create a Helm Override File
In this step you create a helm override values file to enable Edge Delta to access the in-cluster file locations.
- Create a YAML file and name it appropriately, such as
custom-values.yaml. - Add the following YAML to the file:
volumeProps:
  volumeMounts:
    - name: input-file
      mountPath: /mnt/inputfile/logs
      readOnly: true
  volumes:
    - name: input-file
      hostPath:
        path: /mnt/inputfile/logs
        type: DirectoryOrCreate
2. Install the Edge Delta Fleet
Run the Helm deployment commands for the configuration:
- In the Edge Delta App, click Pipelines.
- Click the pipeline you want to deploy and select Add Agents.
- Select Helm.
- Copy and run the first command provided to create the edgedelta namespace in the cluster.
helm repo add edgedelta https://edgedelta.github.io/charts
- Copy and run the second command provided.
helm repo update
- Copy the third command provided in the UI, and append the override values file. The command will look similar to this but with a different Pipeline ID, note the
-f custom-values.yaml:
helm upgrade edgedelta edgedelta/edgedelta -i --version v0.1.92 --set secretApiKey.value=123456789987654321 -n edgedelta --create-namespace -f custom-values.yaml
In this example the custom YAML file was called custom-values.yaml, replace it with the name of the file you created in step 1.
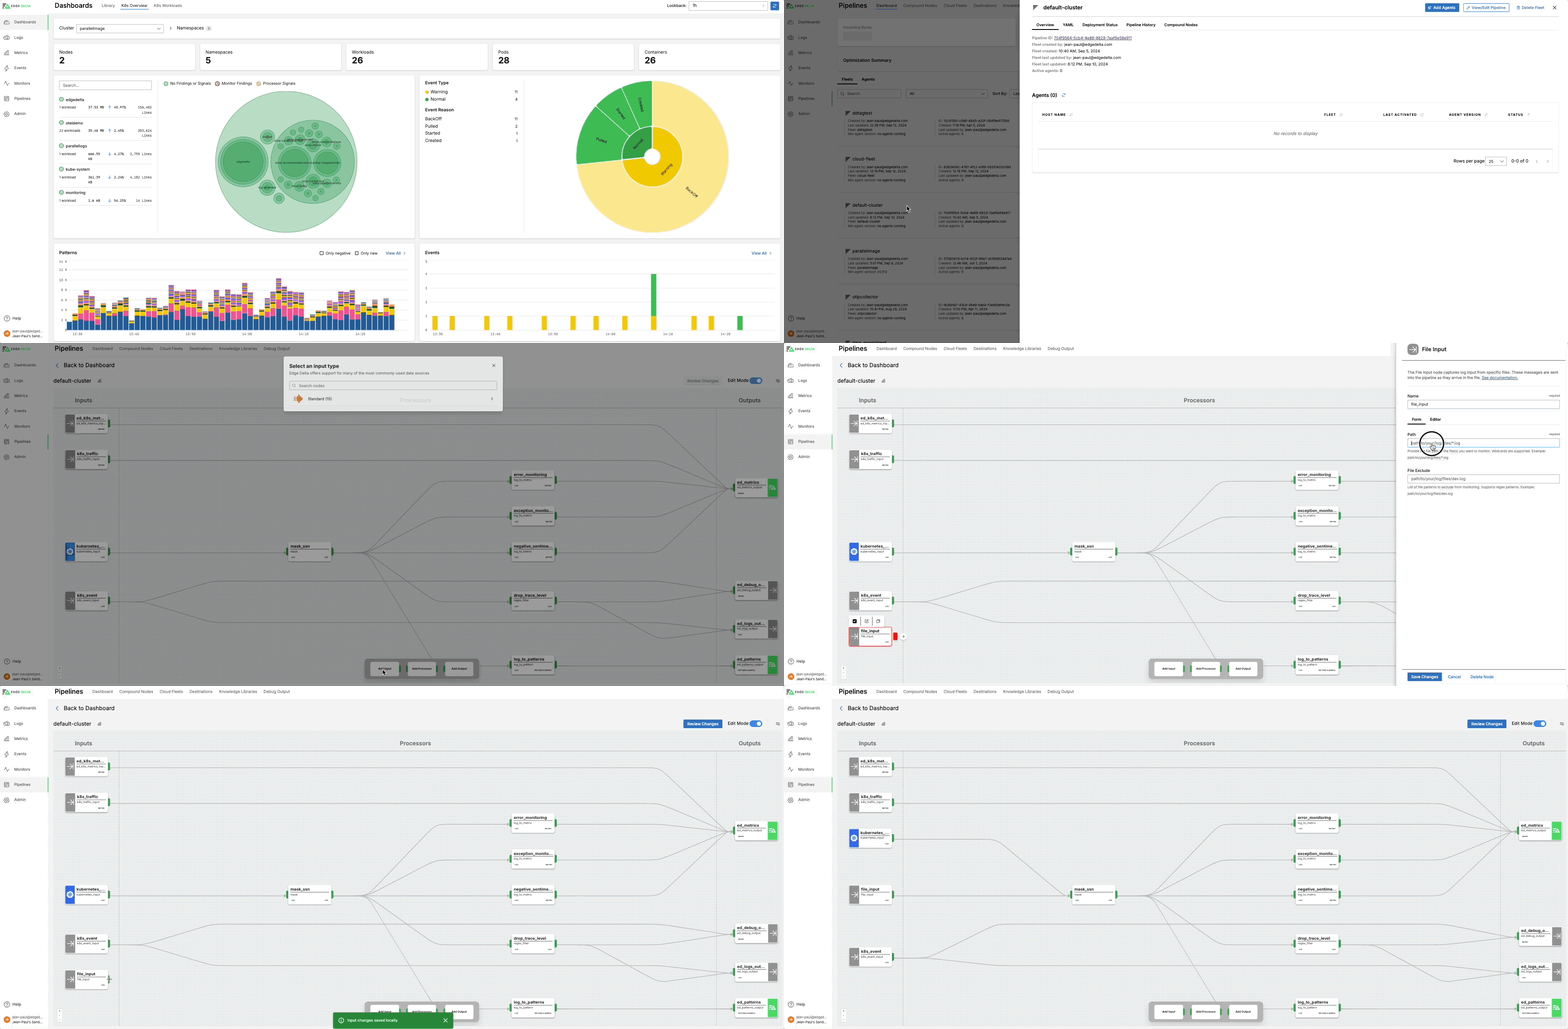
3. Create the File Source Node
- In the Edge Delta App, click Pipeline.
- Select the pipeline you want to add the file input to and click View/Edit Pipeline.
- Click Edit Mode
- Click Add Source, expand Collect and select File Source.
- Specify a Name for the file source node.
- Specify the path containing the files you want to tail for logs. The path should match the one you specified in the Edge Delta custom manifest. The file name can use wildcards to tail a number of files.
- Optionally, specify a filename pattern for files in that folder that should not be tailed for logs.
- Click Okay.
- Connect the file input to the first processor in the pipeline.
In this example, the files you want to tail for logs is captured with the following pattern: /mnt/inputfile/logs/*.*.

- Click Review Changes.
- Click Save Changes.
The Edge Delta fleet will now ingest logs saved to any file in the /mnt/inputfile/logs location. By default, it creates one log per line. If your logs are split with another character such as a semi-colon instead of a line break, you can configure and add a Split Delimiter node to the pipeline.